Year: 2023

  • Let’s Try Sutra Copying! Places to Experience Sutra Copying in Tokyo, Kyoto, and Nara.

    Let’s Try Sutra Copying! Places to Experience Sutra Copying in Tokyo, Kyoto, and Nara.

    First, we recommend joining a sutra copying experience casually.

    There are many temples where you can experience sutra copying. It’s a great way to spend some leisurely time in between sightseeing.

    Cafes for Sutra Copying Besides Temples

    Recently, it seems that there are “temple” cafes where you can also experience sutra copying. On your days off, you can easily try sutra copying at a nearby cafe.

    Sutra Copying in Kyoto

    We will introduce places for sutra copying in Kyoto, a city filled with tourist attractions. (Information as of January 2017)

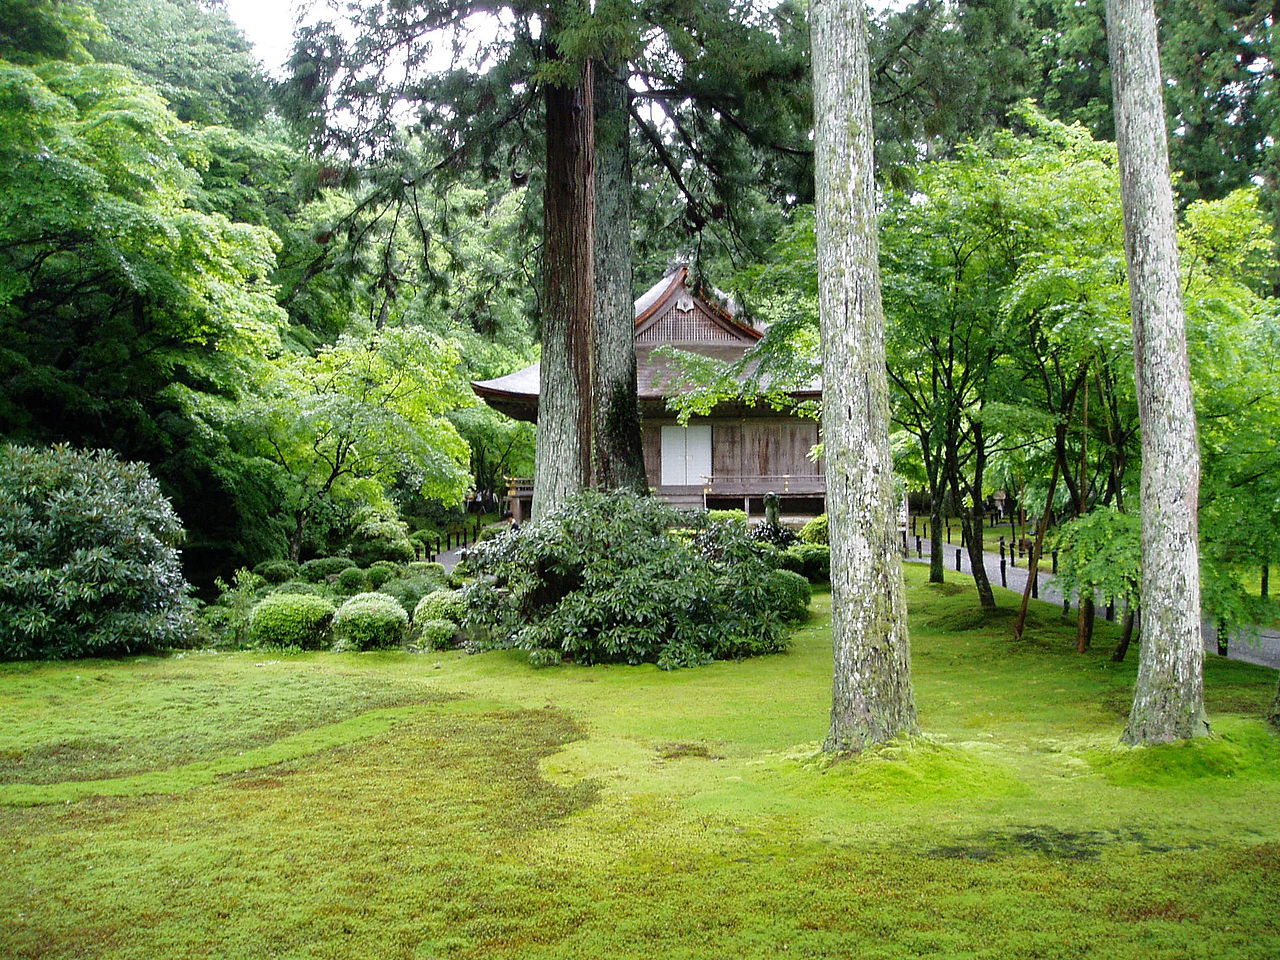
    Sanzenin Temple in Oohara, Kyoto

    Sanzenin is a Tendai sect temple located in Ohara, Sakyo Ward, Kyoto. It is also called Sanzenin Monzeki. The mountain’s name is Gyo-zan, and its main deity is the Medicine Buddha (Yakushi Nyorai) with founder Saicho. It is located in Ohara, a place once known as a retreat for nobles and Buddhist practitioners. Along with Shorenin Temple and Myohoin Temple, it is one of the three head temples of the Tendai sect.
    source:Wikipedia

    ■Address 
    540 Raigoin-cho, Ohara, Sakyo-ku, Kyoto City
    ■Opening Hours
    March to October, 9 AM to 5 PM (Gate closes at 5:30 PM);
    November, 8:30 AM to 5 PM (Gate closes at 5:30 PM);
    December to February, 9 AM to 4 PM (Gate closes at 4:30 PM)
    ■Admission Fee
    Adults 700 yen (600 yen for groups of 30 or more),
    Junior High School Students 400 yen (300 yen for groups of 30 or more),
    Elementary School Students 150 yen
    ■Sutra Copying Fee 1,000 yen
    Website
    http://www.sanzenin.or.jp/

    Daikaku-ji Temple, Former Saga Imperial Palace

    Daikaku-ji is a Shingon Buddhist temple located in Saga, Ukyo Ward, Kyoto. It is the head temple of the Shingon Risshu sect. The mountain name is Sagasan. The main deity is Mahavairocana, and the founder was Emperor Saga. It was once an imperial villa and later became a temple. It has a deep connection to Japanese political history, as it was where Emperor Uda conducted his cloistered rule.

    source:Wikipedia

    ■Address
    4 Saga-osawachou, Ukyo Ward, Kyoto, Kyoto Prefecture
    ■Opening Hours
    9 AM to 5 PM (Reception closes at 4:30 PM)
    ■Admission Fee
    Adults: 500 yen Elementary and Middle School Students: 300 yen
    ■Sutra Copying Fee
    Sutra Copying Offering: 1,000 yen Gyati (a shorter sutra) Copying Offering: 500 yen Copying the Sutras of Buddha Offering: 1,000 yen (in addition to the admission fee)
    Website
    https://www.daikakuji.or.jp/

    Tenryu-ji Temple

    Tenryu-ji (天龍寺), located in Susukinobabacho, Saga Tenryu-ji, Ukyo Ward, Kyoto, Kyoto Prefecture, is the head temple of the Rinzai Zen Tenryu-ji branch. The mountain’s name is Reigisan (霊亀山). The temple’s full name is Reigisan Tenryu Shiseizen-ji (霊亀山天龍資聖禅寺). Its principal deity is Shakyamuni Buddha, and it was founded by Ashikaga Takauji. The founding monk was Muso Soseki. Tenryu-ji is considered the foremost of the Kyoto Gozan temples and holds a significant place as a Zen temple connected to the Ashikaga shogunate and Emperor Kammu. It is registered as a UNESCO World Heritage Site as a cultural asset of ancient Kyoto.

    source:Wikipedia

    ■Address
    68 Susukinobabacho, Tenryu-ji, Saga, Ukyo Ward, Kyoto City, Kyoto Prefecture
    ■Opening Hours
    From 8:30 AM to 5:30 PM (Gate closes at 5:30 PM)
    *From October 21st to March 20th, the gate closes at 5:00 PM.
    ■Admission Fee

    Garden (Sogen Pond and Hyakka-en): High School Students and Above: 500 yen Elementary and Middle School Students: 300 yen Preschool Children: Free

    Hall Visits (Daikodo, Shoin, and Tahoden): Additional 100 yen on the above fees (Note: Some hall visits may be suspended during special events.)

    ■Sutra Copying Fee
    • 1,000 yen (Additional 600 yen for admission is required separately) *Sutra copying tools are not required.

    Website
    http://www.tenryuji.com/

    Hojyu-ji Temple

    Hojyu-ji (ほうじゅうじ) is a Buddhist temple of the Tendai sect located in Higashiyama Ward, Kyoto, Japan.

    source:Wikipedia

    ■Address
    655 Sanju-sangendo-mawarichou, Higashiyama Ward, Kyoto City, Kyoto Prefecture
    ■Opening Hours
    From 6:00 AM to 5:00 PM
    ■Admission Fee
    500 yen (Includes an informational brochure) *For those interested, matcha tea and sweets can be provided separately for an additional 500 yen.
    ■Sutra Copying
    1,500 yen (Includes both sutra copying and admission fees)
    Website
    http://www.jrtours.co.jp/kyoto_plan/enjoy/200806.html

    Bishamon Hall – Shorin-ji Temple

    Shorin-ji is a sub-temple of the To-ji Temple known for its blessings of victory and prosperity. The main deity is the “Bishamonten Standing Statue,” a wooden sculpture believed to be the work of the Heian period Buddhist sculptor Jochō, which was discovered inside the ceiling of To-ji Temple during the Edo period.

    ■Address
    15-795 Honmachi, Higashiyama Ward, Kyoto City
    ■Admission Fee
    • Adults: 800 yen (Includes an explanation of temple treasures)
    • Students (Elementary, Middle, High School): 500 yen (Groups of 8 or more)
    ■Sutra Copying Fee
    1,500 yen per person (Includes a 60-minute session with matcha tea and sweets)
    Website
    http://shourin-ji.org/

    Kennin-ji Temple

    Kennin-ji (建仁寺) is considered Kyoto’s oldest Zen temple. It is also renowned for owning numerous artworks and cultural treasures, including Tawaraya Sōtatsu’s “Wind and Thunder Gods” painting.

    source:Wikipedia

    ■Address
    5 Komatsu-cho, Higashiyama-ku, Kyoto City
    ■Admission Fee
    Adults 500 yen, Elementary and Middle School Students 500 yen
    ■Opening Hours
    10:00 AM to 4:30 PM (March 1 to October 31), 10:00 AM to 4:00 PM (November 1 to February 28), Closed from December 28 to December 31
    ■Sutra Copying Fee
    1,000 yen for a 45-minute session Website: Kennin-ji Temple
    Website
    http://www.kenninji.jp/index.php#/

    Sutra Copying Experience in Nara

    Here are some temples in Nara where you can experience sutra copying. Why not try sutra copying while visiting the World Heritage Sites in Nara?

    Todai-ji Temple

    Todai-ji Temple is a head temple of the Kegon sect and is famous for the “Great Buddha of Nara” (Rushanabutsu) as its principal deity.

    source:Wikipedia

    ■Address
    406-1 Zoshicho, Nara City, Nara Prefecture
    ■Admission Fee
    Adults and High School Students: 500 yen, Elementary School Students: 300 yen
    ■Sutra Copying Fee
    1,500 yen per person
    ■Reservation
    Contact the Todai-ji Temple Sutra Copying Office at 0742-22-5511 with your preferred date and time.
    Website
    http://www.todaiji.or.jp/contents/sutra/

    Yakushiji Temple

    Yakushiji Temple is the head temple of the Hosso sect and has been a UNESCO World Heritage Site since 1998.

    source:Wikipedia

    ■Address
    457 Nishinokyocho, Nara, Nara Prefecture
    ■Admission Fees (Excluding when Genjo Sanzo-in is closed)
    • Adults: 800 yen
    • Middle and High School Students: 500 yen
    • Elementary School Students: 200 yen
    ■Sutra Copying Reception Hours   
    • From 8:30 AM to 5:00 PM as needed
    ■Sutra Copying Fee
    • 2,000 yen per person (for the Heart Sutra)
    Website
    http://www.nara-yakushiji.com/

    Taima-dera

    Taima-dera Temple, located in Katsuragi City, Nara Prefecture, is a temple dating back to the 7th century. It is known for its faith in the “Taima Mandala,” which depicts the Western Pure Land, and the legend of Princess Nakatsuhime associated with the mandala.

    source:Wikipedia

    ■Address
    Taima 1263, Nakano-bo, Katsuragi City, Nara Prefecture
    ■Admission Fee (for entry to Nakano-bo)
    Adults: 500 yen Children: 250 yen
    ■Visiting Hours
    9:00 AM to 5:00 PM
    ■Sutra Copying Reception Hours
       From 9:00 AM to 3:30 PM (ongoing)
    ■Sutra Copying Fee
    2,000 yen per person (subsequent visits may have different fees)
    Website
    http://www.taimadera.org/index.html/

    Sutra Copying Experience in Tokyo and Kamakura

    We’re introducing some temples in Tokyo and “temple cafes” where you can relax and enjoy your time.

    Naritasan Tokyo Betsuin Fukagawa Fudodo

    This temple belongs to the Shingon sect, Chisan school, and is located just a 3-minute walk from Monzen-Nakacho Station on the Tozai and Oedo subway lines. It’s well-known as Fukagawa Fudodo.

    source::Wikipedia

    ■Address
    1-17 Tomioka, Koto-ku, Tokyo
    ■Admission Fee
    ■Sutra Copying Reception Hours
    Daily from 9 AM to 2 PM (ongoing)
    ■Sutra Copying Reception Hours
     Daily from 9 AM to 2 PM (ongoing)
    ■Sutra Copying Fee
    Starts from 2,000 yen per person
    Website
    http://fukagawafudou.gr.jp/

    Yakushiji Tokyo Betsuin

    Yakushiji Tokyo Betsuin is a branch temple of Nara’s Yakushiji Temple, located on a quiet hill in Ikedayama, just a few minutes’ walk from JR Gotanda Station.

    ■Address
    5-15-17 Higashi-Gotanda
    ■Admission Fee
    Free
    ■Sutra Copying Reception Hours
    9 AM to 5 PM (ongoing)
    ■Sutra Copying Fee
    2,000 yen per person (Heart Sutra)
    Website
    http://www.yakushiji.or.jp/about/

    Temple Cafe in Daikanyama – Shingyo-ji

    Just a 2-minute walk from Daikanyama Station, this café is operated by the Jodo Shinshu Hongwanji-ha sect’s “Shingyo-ji” temple.

    ■Address
    1-33-15 EN Daikanyama Building 1F, Ebisu Nishi, Shibuya-ku, Tokyo
    ■Business Hours
    11:00 AM to 10:00 PM (Last order at 9:00 PM) Closed at the end of the year
    ■Sutra Copying Fee
    ¥1,500 per person
    Website
    http://tera-cafe.com/syakyo/index.html/

    Kamakura Otela Cafe

    “Kamakura Otela Cafe” is operated by Joreiji, a venerable Jodo Shinshu Buddhist temple with a rich history dating back to the Kamakura period, located in Yokosuka City.

    ■Address
    2F Ooji Building, 2-12-35 Komachi, Kamakura, Kanagawa Prefecture
    ■Business Hours
    11:00 AM to 7:00 PM Open every day (with occasional temporary closures)
    ■Sutra Copying Fee
    Petit Sutra Copying Set: ¥1,000 per person
    Website
    http://www.oteracafe.jp/oteramenu/index.html#petit/
  • Introducing Backing Methods and Special Backing Paper!

    Introducing Backing Methods and Special Backing Paper!

    We’ve received a new stock of special backing paper that allows for easy backing using just an iron and a spray bottle. Backing helps prevent wrinkles and sagging in your artworks, providing reinforcement. Have you ever created a piece of art that turned out beautifully but is just sitting there untouched? Well, if you back your well-done artworks, you can display them whenever you like. In this guide, we’ll introduce how to use backing paper, so please give it a try.

    What You’ll Need:

    • Backing Paper (For framing, we recommend thick paper; for scroll mounting, thin paper)
    • Iron
    • Spray bottle
    • Utility knife
    • A surface to use while spraying and ironing

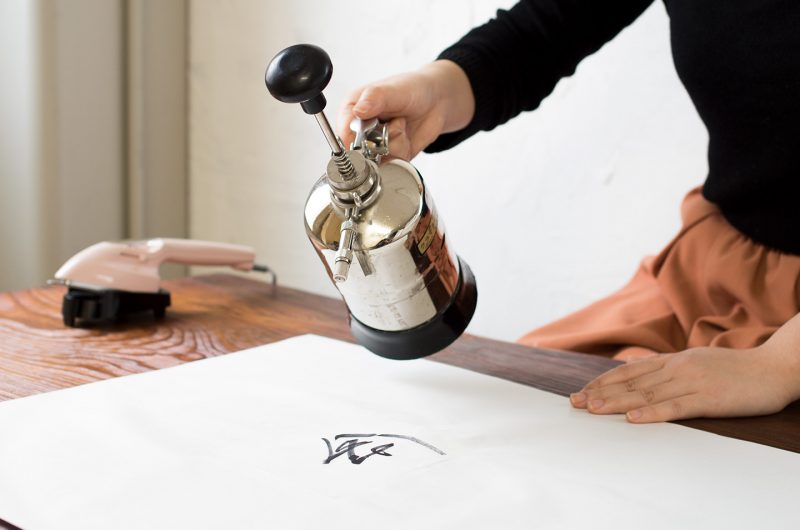
    1. Stretch Your Artwork Flip your artwork over and evenly mist it with the spray bottle to ensure no unevenness. Allow it to dry until wrinkles are no longer present (about 10-15 minutes).

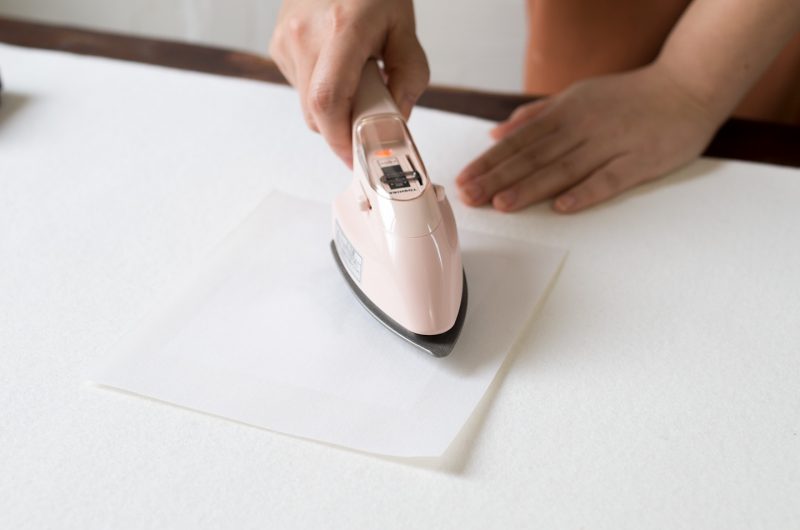
    2. Attach the Backing Paper With the artwork still facing down, move it to an ironing board. Prepare a piece of backing paper the same size as your artwork or slightly larger, ensuring the glossy side is facing the back of your artwork.

    3.Iron It On Use a Teflon-coated iron set to medium to high heat (around 130 degrees Celsius). Starting from the center of the paper, gently press from the center towards the right and then from the center towards the left, ensuring there are no air bubbles or shifting. After one pass, iron again to prevent unevenness. Once finished, let it sit for about 5 minutes until the temperature cools down.

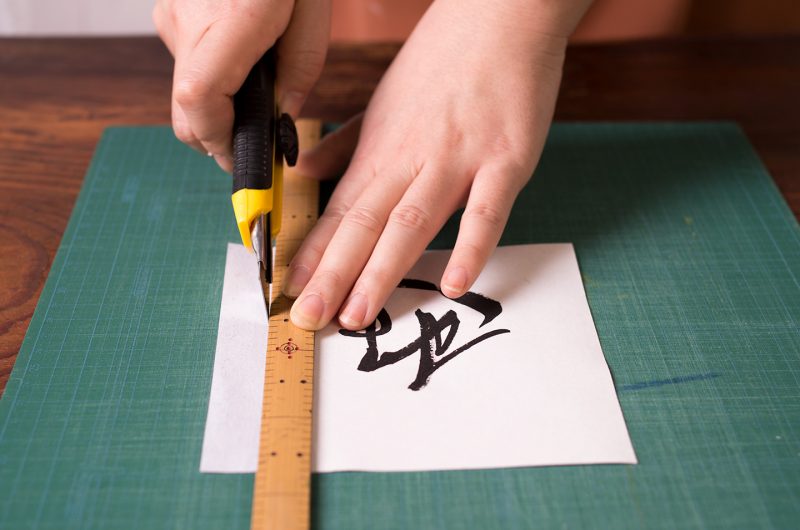
    4.Finish It Up Trim any excess paper using a utility knife. If you plan to display your artwork, place it in a scroll mounting or a frame, and it’s ready! Note: If you don’t allow the artwork to dry properly after misting, it may lead to damage or poor adhesion. Be careful not to over-dry, as this can cause wrinkles. If warping or bending occurs after adhesion, apply weight using books or similar items. It should flatten out and look clean after about 3 hours.


    You can find a complete list of art materials here.

  • Introduction to Calligraphy Sets for Adults Starting Now

    Introduction to Calligraphy Sets for Adults Starting Now

    Recommended Calligraphy Sets for Adults

    January is a month filled with anticipation for new beginnings. It’s a time when many people are thinking about what new activities they want to pursue in the coming year. Perhaps this year, you’re considering starting calligraphy, trying your hand at penmanship, or writing beautiful letters with elegant characters. Calligraphy offers the opportunity to explore new creative ventures, and there are plenty of individuals looking to embark on this journey. If you’re one of them, we encourage you to consult with us at Shoyudo! Our online staff can introduce you to recommended products that will provide everything you need to start your calligraphy journey.

    Brushes

    One recommended brush for beginners is the “Unshu Chugokugo” brush. It’s a versatile brush that’s easy to handle for newcomers to calligraphy. With its balanced blend of firmness and softness, it’s well-suited for writing on traditional Japanese paper (hanshi) and can handle characters of various sizes, from two to six characters. So, whether you’re starting calligraphy for the first time or rediscovering your passion for it, we’re here to assist you in finding the right tools and materials to make your calligraphy experience a rewarding one.

    Ink

    “Japanese-Made 5-Star Safflower Ink 1.5 Sticks” This ink is made using extremely fine soot particles, making it suitable not only for calligraphy but also for sutra transcription! It’s a handy tool to have in your collection.

    Inkstone

    “Kakujo Shihira” This inkstone is produced in Ogatsu, one of Japan’s leading inkstone manufacturing regions. Its smooth texture and craftsmanship make it a perfect inkstone for adult calligraphy, slightly different from what you might have used as a student. We also recommend the standard size, Shigohei (available for 1,875 yen).

    Felt Underlay for Hanshi Paper

    The felt underlay adds a sense of luxury and volume. If you apply strong brush pressure, we recommend the larger size. This felt underlay is designed for Hanshi paper and has a thickness of 2mm.

    Paperweight for Bunchin Nickel Silver (Medium)

    For four-character compositions on Hanshi paper, we recommend the medium-sized paperweight.

    Brush Stand

    Other Items You Might Find Useful “Angilas Brush Stand – Medium” This brush stand is made of Mino-yaki ceramics. It exudes an air of sophistication and sets the mood for a focused and tense atmosphere. It’s just the right size to accommodate both large and small brushes.

    Water Dropper

    “Water Dropper – Small Plum Blossom Design” Water droppers are used to add water while grinding ink.

    Why not start with an adorable and affordable option? If you find calligraphy challenging to start on your own, consider looking for a nearby class where you can observe brush techniques and more. For those interested, Shoyudo has classes available in our Osaka and Kyoto stores that you can join starting from a single session. If you have any questions, please feel free to inquire.


  • I Want to Try It – About Premium Wool Brushes

    I Want to Try It – About Premium Wool Brushes

    What is a Premium Wool Brush?

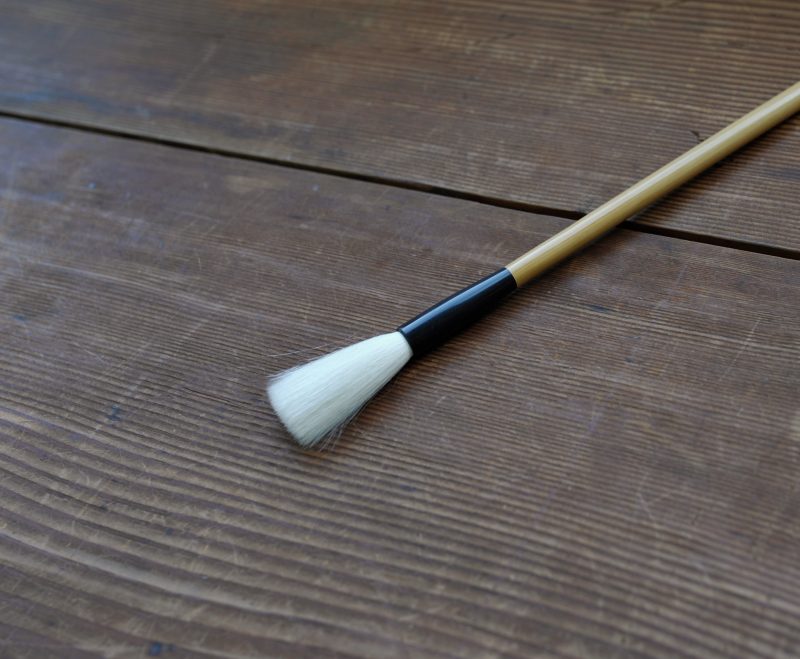
    A wool brush, also known as a “羊毛筆” (yōmō fude) in Japanese, is a brush made entirely from goat hair. It is characterized by its soft bristles, good elasticity, and excellent ink absorption. Premium wool brushes are crafted using select goat hairs from within the goat’s coat. These brushes allow for creating gentle and nuanced calligraphy. When used with a short tip, they produce warm and full-bodied strokes, while with a long tip, they can create refined and elegant lines. Wool brushes are exceptionally soft, requiring skill to wield effectively. However, they offer an outstanding writing experience, making them recommended for those who wish to explore new calligraphy styles.

    ~Renowned Calligraphers and Wool Brushes~

    Wool brushes have been favored by many accomplished calligraphers. Figures like Ueda Sōkyū (上田桑鳩) and Teshima Yūkei (手島右卿) are known for their dedication, even creating their own original wool brushes. Wool brushes are essential for expressing the moment when the ink is applied to paper, showing the gradual spread of ink and the appearance of texture. Writing with a wool brush also demands an awareness of the brush’s core and the balance of characters, making it a valuable tool for learning calligraphy, be it for kanji or kana. We recommend trying various types of wool brushes if you aspire to delve deeply into the art of calligraphy.

    ~Price Comparison with Other Brands~

    At Shoyu Online, our wool brushes are offered at a lower price while maintaining high quality. This is achieved through our manufacturer’s unique sourcing of raw materials and production processes. When properly maintained through regular cleaning and other forms of maintenance, wool brushes are said to be lifelong tools. As you use them, the bristle tips gradually turn golden, enhancing their usability. We encourage you to give them a try.

    Exceptional Writing Experience! A Must-Try Favorite –
    「Shuhitudo  Saidonkouhou (秀筆堂 細嫩光鋒)」

    What is the Premium Wool Brush「Saidon kouhou」? The cost of wool brushes can vary depending on the part of the goat’s body from which the hairs are obtained. “Saidon kouhou” brushes come from the beard of young male goats raised in very limited regions downstream of the Yangtze River in China. These brushes are exceptionally expensive because only a tiny amount can be collected from each goat. At Shuhitudo, we meticulously select hairs that are both fine at the tip and have good springiness, with slightly transparent ends, to create our brushes.


    View the  Shuhitudo Saidon kouhou (秀筆堂 細嫩光鋒)  Collection Here: >>Shuhitudo Premium Wool Brush

    asy to Manage and Write Neatly – The Popular
    「Sakisuki Wool Brush Mujin (先梳羊毛筆 無尽)」

    What is the Sakisuki Wool Brushi? The cost of wool brushes can vary depending on the part of the goat’s body from which the hairs are obtained. “Saidon kouhou” brushes come from the beard of young male goats raised in very limited regions downstream of the Yangtze River in China. These brushes are exceptionally expensive because only a tiny amount can be collected from each goat. At Shuhitudo, we meticulously select hairs that are both fine at the tip and have good springiness, with slightly transparent ends, to create our brushes.

    View the  Sakisuki Wool Brushi Mujin (先梳羊毛筆 無尽) Collection Here: >>Suhitudo Premium Wool Brush

  • Proper Storage and “Laying” of Calligraphy Paper

    Proper Storage and “Laying” of Calligraphy Paper

    Calligraphy paper plays a crucial role among the Four Treasures of the Study. It offers a wide range of textures and appearances depending on its thickness and production method. To preserve the quality of calligraphy paper and make the most of it for creating art, it’s important to follow proper storage practices.

    What is the correct way to store calligraphy paper?

    When it comes to the storage of calligraphy paper, it’s essential to be particularly cautious about direct sunlight and humidity.

    Recommended Storage Location

    Choose a place where direct sunlight does not shine, there is good ventilation, and humidity is minimal. Inside a paulownia box or on top of a chest of drawers is often considered suitable.

    Recommended Storage Methods

    Wrapping the calligraphy paper in newspaper or Japanese paper allows the paper to breathe and provides protection against direct sunlight. Placing a wooden lattice (sudoko) under the calligraphy paper for better ventilation and using moisture-absorbing agents or desiccants for humidity control can be effective. Additionally, adding moth repellent (such as mothballs for clothing) can help prevent insect damage. Be cautious about sealing the paper in materials like vinyl, as it can prevent the paper from breathing and may lead to stains.

    What Does it Mean to “Lay” the Paper?

    There is a saying that paper is generally better when it has aged for a few years rather than being freshly made. The ideal period for aging can vary, with some calligraphers suggesting a period of 10 years. It ultimately depends on the style of the artwork you wish to create and your personal preferences, so feel free to experiment to find the aging period that suits your taste.

    Benefits of Laying the Paper

    Aging paper allows excess moisture to escape and tightens the paper fibers, resulting in several benefits:

    ①Ink permeates the paper adequately, reducing bleeding.
    ②Ink color becomes more beautiful.
    ③Distressed effects (such as fading or wear) appear more attractive.
    ④The brush separates from the paper more smoothly, making it easier to write.

    Paper breathes in humidity and releases it, effectively eliminating gluey residues and moisture. Paper in this dried state is referred to as “aged paper.” Aged paper not only improves ink adhesion and color but also enhances the appearance of effects like bleeding and distress. While aging paper may sometimes lead to slight yellowing or “star” stains, with proper storage, these characteristics can be valued assets.

    It’s important to note that paper containing anti-bleeding agents or dyes (such as decorative paper, processed paper, and machine-made Japanese paper) does not benefit from aging. In fact, these papers can become rigid and prone to breakage during long-term storage.


    Paper Can Catch a “Cold” Too!?

    On the flip side, even if paper is adequately aged, incorrect storage methods can lead to issues like paper appearing white and speckled when ink is applied, a phenomenon akin to “paper catching a cold.” Depending on the aging method, it can even degrade paper quality. Therefore, exercising caution in paper storage is essential.

    In Conclusion

    Calligraphy paper is indispensable for creating artworks. By following proper storage methods, you can significantly enhance the quality of your creations. Experiment with aging your paper using the correct methods to fully appreciate the improved texture and attractive distressing effects.

    Additional Information:

    In recent years, the time between paper production and reaching customers has shortened by several months compared to the past. As a result, the natural drying period for paper has reduced. When paper arrives in your hands, it often hasn’t undergone the same extensive drying period as before, leading to incomplete control over bleeding. Consequently, many papers are treated with “anti-bleeding” agents. Keep in mind that these anti-bleeding effects intensify every few months, so aging paper excessively, as in the past, may transform it into a type of paper that doesn’t absorb ink at all.

    You can find the calligraphy paper introduced by Shoyu Online here.»

  • Cleaning and Grinding an Inkstone

    Cleaning and Grinding an Inkstone

    The inkstone, as a tool for grinding ink, has its origins dating back to the Yin Dynasty, around 2,000 years before the common era. It was introduced to Japan during the Asuka period. In ancient times, inkstones were crafted from various materials, including stone, clay, tiles, jade, and pottery. Over time, with the discovery of stone materials known as “Meikens,” and the skillful work of sculptors, inkstones evolved from utilitarian objects to items appreciated for their artistic value.

    Calligraphy is said to begin with the grinding of ink, so the process of grinding ink is highly regarded. It’s a practice of cleansing the heart and mind while using a clean and well-maintained inkstone.

    Failure to keep your inkstone clean can have detrimental effects. Accumulated ink can degrade the quality of ink and even produce unpleasant odors. Furthermore, the decay of encrusted ink can lead to issues during mounting processes.

    To maintain your inkstone, it’s essential to diligently clean it each time you use it. By doing so, you can keep it in pristine condition and enjoy its use for a long time. Here, we’ll introduce the proper care methods for your cherished “inkstone.”


    How to Clean an Inkstone

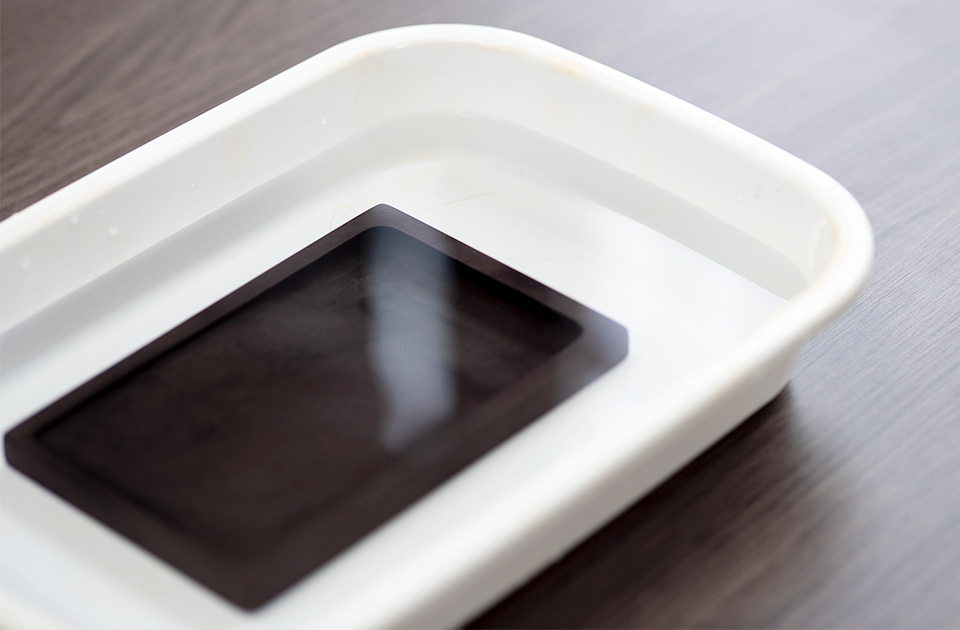
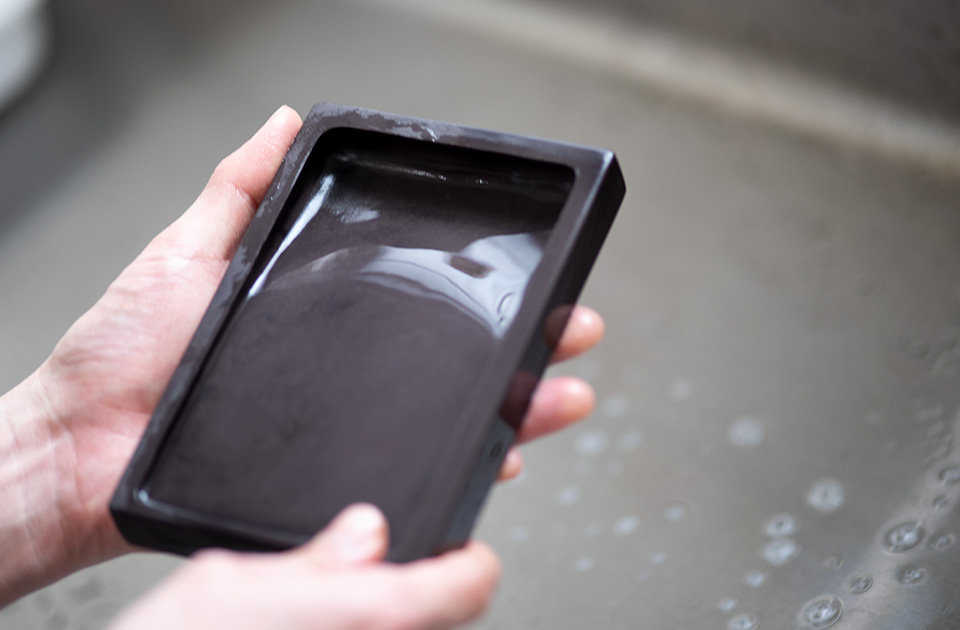
    1.Soak the inkstone in hot water for about 20 to 30 minutes.

    The glue, which is the main ingredient in ink, can be dissolved in hot water. The optimal temperature for dissolving the glue is around 70°C. Soaking the inkstone in water at about 70°C makes it easier to remove accumulated soot and glue residue, and it helps to clear any blockages.

    硯をお湯につけ置きする

    2.Gently clean the inkstone with a soft material.

    To prevent scratching the inkstone, use a soft sponge or a toothbrush with soft bristles to gently and thoroughly rinse it with water. Pay special attention to areas around the edges and corners of the inkstone that may be hard to clean.

    やわらかい素材で硯を洗う

    3.Remove excess moisture and allow it to air dry.

    After washing, use a cloth or similar material to remove excess moisture, and then let the inkstone air dry. Avoid rapid drying methods.

    硯を乾かす

    If the ink has hardened and is difficult to remove:

    When you need to remove stubbornly adhered ink, you can follow the same steps as mentioned above (1, 2, 3) for cleaning. If the ink stains still persist, try soaking the inkstone in hot water for a longer period and repeat the previous steps patiently.

    If you find it difficult to grind the ink:

    Some may have experienced difficulty in grinding ink, feeling that it’s not grinding well or not achieving the desired consistency. The process of grinding ink on the inkstone relies on the fine irregularities on the inkstone’s surface called “Hobo” (鋒鋩). These irregularities act like abrasive surfaces, aiding in the grinding process. However, over time, these irregularities can wear down, making it harder to grind ink.

    If you encounter difficulty in grinding ink, here are some methods to try:

    1.Clean the Inkstone Thoroughly:

    Even if the surface of the inkstone appears clean, there might be soot or glue residue clogging the Hobo’s irregularities, preventing proper grinding. To address this, soak the inkstone in water at around 70°C for 20 to 30 minutes, then gently and thoroughly wash it with a soft sponge or a toothbrush with soft bristles. This process may need to be repeated several times if it hasn’t been done before.

    2.Check the Type of Ink:

    While it’s uncommon for Japanese ink (Sumi) to be difficult to grind, Chinese ink (Tosho) tends to be less easy to grind (resulting in a lighter black). If you are using Chinese ink and are having trouble grinding it to your liking, consider switching to Japanese ink as an alternative.

    3.Resharpen the Inkstone (Hone the Hobo):

    If washing the inkstone and changing the type of ink do not yield satisfactory results, the final option is to resharpen the Hobo, a process known as “Metate” (目立て). This involves carefully re-sharpening the fine irregularities on the inkstone’s surface to restore its grinding efficiency. However, this is a delicate process and should be approached with caution. Please refer to detailed instructions for Metate for specific guidance.

    Metate is a skilled technique and should only be used as a last resort. Proceed with great care and, if unsure, seek guidance from experts in the field.

    Method for Resharpening the Inkstone (Honing)

    There are two main methods for resharpening the inkstone:
    1.Using a cream abrasive
    2.Using a cream abrasive and waterproof sandpaper
    3.Using a dedicated inkstone sharpening stone

    I’ll explain each method in order, but before that, let’s cover some preliminary information.

    High-quality inkstones typically do not experience significant wear from regular use. Therefore, it’s often unnecessary to resharpen a high-quality inkstone. In fact, attempting to resharpen an inkstone can, in some cases, alter its surface color or even lead to damage, as shown in the image below. It is generally recommended only as a last resort for those who are confident in their inkstone care and willing to take full responsibility.

    1.Using a cream abrasive

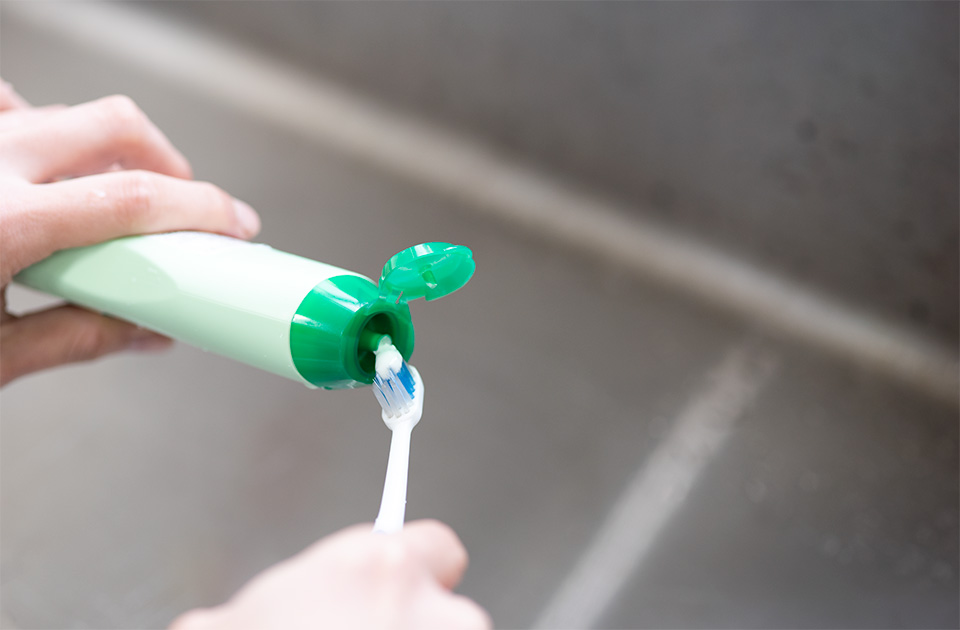
    For this method, you’ll use a well-known cream cleanser like “Jif.” Jif is an alkaline cream cleanser that combines surfactants to lift dirt and abrasive materials to remove stains. The abrasive used in Jif is natural calcite, which is softer than glass or stainless steel and won’t scratch the inkstone’s surface while effectively cleaning it.

    クリーム状の研磨剤を使用する

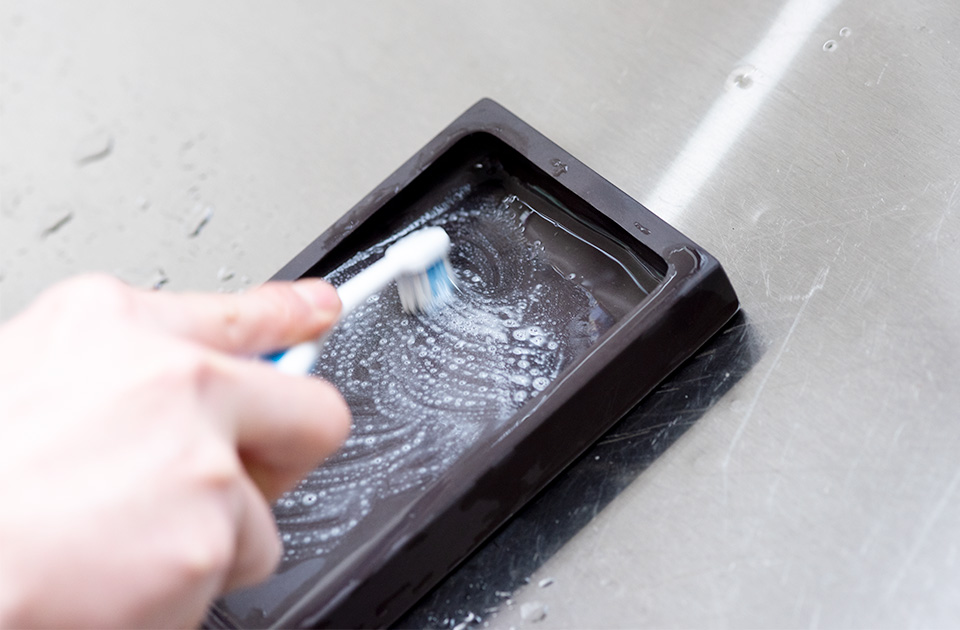
    The usage is quite simple. You soak the inkstone in water at around 70°C, which is said to be ideal for dissolving glue, for about 20 to 30 minutes. The heat from the water helps dissolve any glue that has adhered to the inkstone. After removing the inkstone from the water, apply Jif to a toothbrush and gently rub it in a circular motion as if you were grinding ink. (Be sure not to scrub too vigorously.) Make sure to rub not only the inkwell (hill) where you grind ink but also the corners and hard-to-reach places where ink tends to accumulate. By repeating this process all over the inkstone multiple times, the coarse particles of Jif’s abrasive will gradually become finer. So, be patient and make it clean.


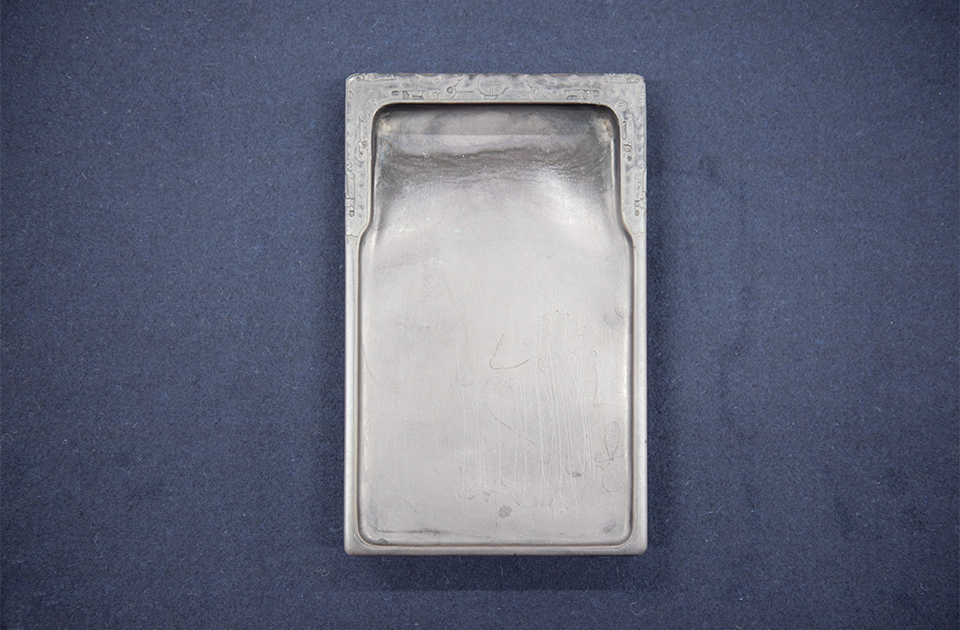
    Once it’s clean, rinse the inkstone thoroughly with water at about 40°C and wipe away any excess moisture. Due to the surface being worn down by the Jif, the inkstone’s color may change to its original bright stone color, but don’t worry. It will naturally blend in as you continue to use and clean the inkstone.

    硯をジフでやさしくこする
    ジフ研磨後

    Here’s the state after Jif polishing.
    Please note that when you perform this polishing, the color of the inkstone will inevitably change as shown in the post-polishing image. If you prefer not to change the color of your inkstone, it’s advisable not to proceed with the honing.

    2.Using a Cream Abrasive and Waterproof Sandpaper

    If the inkstone honed with Jif in the previous step feels like the irregularities (Hobo) are too pronounced, you can use waterproof sandpaper (refer to *Note 1 for the grit size) to fine-tune it.

    Start by thoroughly wetting the inkstone and then use waterproof sandpaper to polish the entire inkwell (hill) where you grind ink. This will help to remove excess parts around the Hobo while keeping the Hobo itself intact, improving the grinding experience.

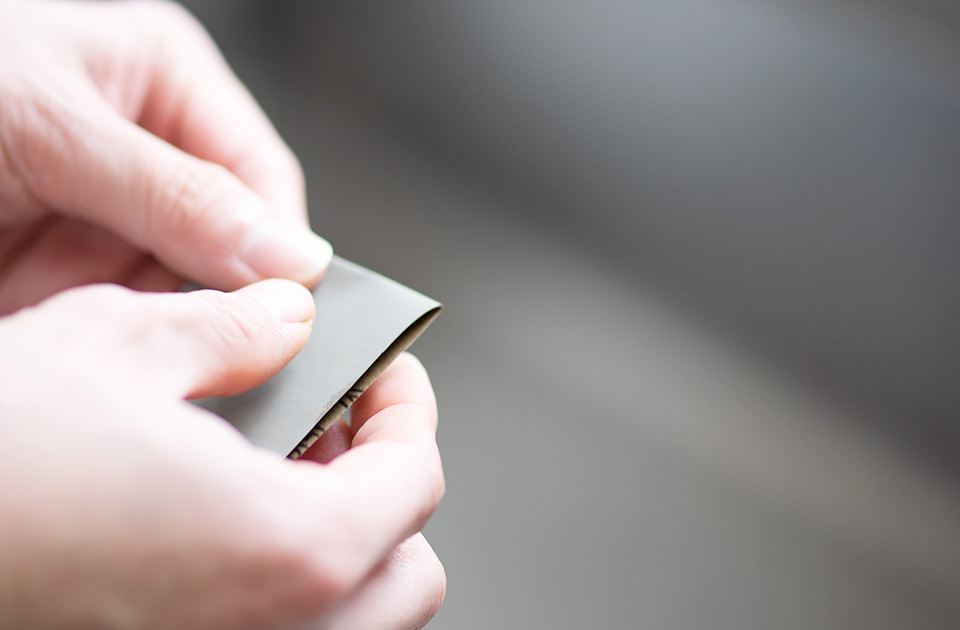
    Cut the waterproof sandpaper into small pieces, fold them, and place them on your fingertip. Imagine making circular motions as you would when grinding ink, and rub the entire surface evenly. Rather than pressing the sandpaper onto the inkstone with force, apply gentle, even pressure across the surface. Keep in mind that waterproof sandpaper tends to clog quickly, so replace it a few times as you sense resistance to maintain consistent performance.

    耐水ペーパーを使用する

    (*Note 1) The grit size of the waterproof sandpaper may need to be adjusted based on the type of inkstone you have. Here are rough guidelines for the grit size of waterproof sandpaper:

    For Enden Inkstones: #2000 to #3000 For Keisyu Inkstones: #800 to #1000 For Romen Inkstones: #600 to #700 For Student Romen Inkstones: #400 to #500 *Note that the higher the number, the finer the grit. If you seek a finer polishing texture, you can use #3000 or #4000 waterproof sandpaper.


    As previously mentioned, it’s generally not necessary to hone a well-maintained inkstone. Honing should only be considered as a last resort, and it should be undertaken with self-responsibility, keeping in mind that it can change the inkstone’s appearance.

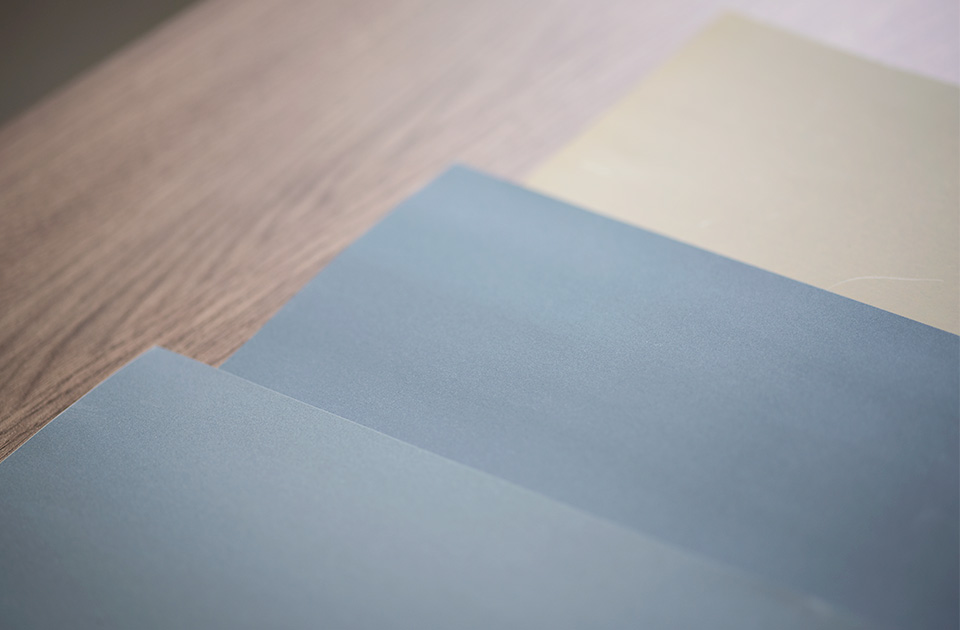
    耐水ペーパーの種類

    *Please note that when polishing, the color of the inkstone will inevitably change as shown in the post-polishing image. If you prefer not to change the color of your inkstone, it’s advisable not to proceed with the honing.

    3.Using a Dedicated Inkstone Sharpening Stone

    One well-known method for honing an inkstone is to use a dedicated inkstone sharpening stone. These stones are typically made by cutting solidified layers of clay. However, since clay sharpening stones may contain ultra-fine impurities like metal, gravel, or glass, there is a possibility that they can scratch the inkstone when used.

    Now, let’s discuss how to use the sharpening stone on the inkstone. When using a clay sharpening stone, it’s essential to soak the inkstone in water beforehand and then gently apply the sharpening stone as if you were grinding ink.

    For the corners of the inkstone or hard-to-reach areas, consider breaking the sharpening stone into smaller pieces and using these fragments for sharpening.

    It’s crucial to understand that when applying the sharpening stone, the goal is not to correct the irregularities on the inkstone’s surface but rather to perform honing. Therefore, instead of exerting force while using the sharpening stone, apply gentle pressure similar to how you would when grinding ink.

    Once you’ve finished using the sharpening stone, thoroughly rinse the inkstone, and wipe away any excess moisture.

    Using the Sharpening Stone on Suitable and Unsuitable Inkstones

    Since clay sharpening stones are made from natural materials, there’s a possibility that the ultra-fine gravel contained in them can damage the inkstone. Therefore, if you’re wondering which inkstones are suitable for clay sharpening stone use, the honest answer is that “in general, it’s wise to avoid using clay sharpening stones on any inkstone.” Because clay sharpening stones are made from natural materials, it’s possible for the tiny gravel to damage the inkstone. If you absolutely need to use a clay sharpening stone, it’s recommended to do so only on an inkstone you can accept potential damage on.

    When Ink Doesn’t Grind Well Right After Purchase

    This is a phenomenon often observed with Chinese inkstones. Newly purchased inkstones are sometimes coated on the surface to maintain their visual appeal. However, these coated inkstones may not perform well when grinding ink, with the ink appearing resistant and sliding on the inkstone’s surface, sometimes even repelling water.

    In such cases, follow the instructions for “Cleaning the Inkstone.” Soak the inkstone in water at around 70°C for about 20 to 30 minutes, then gently clean it with a soft material, repeating this process several times. This will remove the coating, allowing the ink to grind effectively. (Since the coating on the inkstone is often made of wax, the ideal temperature for dissolving wax is similar to the temperature for dissolving glue, around 70°C.)

    If you still feel some discomfort even after multiple cleanings, simply continue using the inkstone for grinding ink and cleaning it as you would normally. Over time, the coating will naturally wear off, and the inkstone will return to its original grinding condition.

  • Sizes of Calligraphy Paper

    Sizes of Calligraphy Paper

    When you think of calligraphy paper, what comes to mind? In fact, there are numerous types and names for calligraphy paper sizes. They are already pre-cut to standard dimensions, so you can choose a paper size that suits your purpose. While the variety might seem confusing, it’s not difficult to select one based on your goals and intended use. We will now provide a clear introduction to calligraphy paper sizes.

    The basic size of calligraphy paper is “Yonshaku Gasen.”

    The most fundamental size in calligraphy paper is “Yonshaku Gasen” (四尺画仙), which has dimensions of approximately 69 × 136 cm. It is also known by other names such as “Zenshi” (全紙), “Shōgasen” (小画仙), and “Yonshaku Mono” (四尺物). Using “Yonshaku Gasen” as the base, it is often cut vertically in half to create the “Hansetsu” (半切) or “Jōfuku” (条幅) size. For works submitted to open exhibitions and contests, there are designated sizes according to each event’s rules. Please be aware that the specified size for these exhibitions refers to the dimensions when framed, so keep this in mind.

    At Shoyu Online, you can choose from various special-sized paper options.

    Representative Paper Sizes

    I have summarized the representative paper sizes and their names in a table from largest to smallest. Please refer to the diagram below for reference.

    No. size Pronunciation cm(width×height) Different Names
    1 2×8尺 2×8 Shaku Approximately60×240cm 2×8(Nihachi)
    2 尺八屏 Shaku happei Approximately53×234cm Chinese Standard Size
          Approximately53×228cm Japanese Standard Size
    3 六尺画仙 Rokushaku gasen Approximately96×180cm 大画仙(Daigasen)
    4 3×6尺 3×6 Shaku Approximately90×180cm 三六(Saburoku)
    5 2×6尺 2×6 Shaku Approximately60×180cm 二六(Niroku)
    6 五尺画仙 Goshaku gasen Approximately84×150cm 中画仙
    7 四尺画仙 Yonshaku gasen Approximately69×136cm 全紙(Zenshi)・小画仙(Shougasen)・四尺物(Yonshakumono)
    8 聯落ち Renochi Approximately53×136cm ―
    9 半切 Hansetu Approximately34.5×136cm ―
    10 八つ切 Yatugiri Approximately17.5×68cm ―
    11 全懐紙 Zenkaishi Approximately36.5×48.5cm ―
    12 半懐紙 Hankaishi Approximately24.5×36.5cm ―
    13 半紙 Hanshi Approximately24.3×33.4cm ―

    Common Paper Sizes and Names

    “Yonshaku Gasen” (四尺画仙)

    Dimensions: Approximately 69 × 136 cm. It is also known by other names such as “Zenshi” (全紙), “Shōgasen” (小画仙), and “Yonshaku Mono” (四尺物).

    “Hansetsu” (半切)

    Dimensions: 34.5 × 136 cm. Hansetsu is created by vertically cutting “Yonshaku Gasen” (Zenshi) in half. Traditionally, it has been the most commonly used size.

    “Renochi” (聯落ち)

    Dimensions: 53 × 136 cm. It is a size obtained by cutting “Zenshi” into 3/4 of its original width. For a paper size of 53 × 228 cm, often used in open exhibitions and sometimes referred to as “Renochi,” it’s important to note that the term “Renochi” has come to refer more to the “width of the paper” due to decreased use of the traditional “true Renochi.” In this context, “Renochi” is roughly equivalent to “53 cm width,” and it’s essential to confirm the length.

    “Shaku happei” (尺八屏)

    This is a Chinese standard size with dimensions of approximately 53 × 234 cm. The Japanese standard size is approximately 53 × 228 cm. There is a difference of about 6 cm in length between the two standards, but both are widely used for open exhibitions.

    “Ni-Hachi” (2×8)

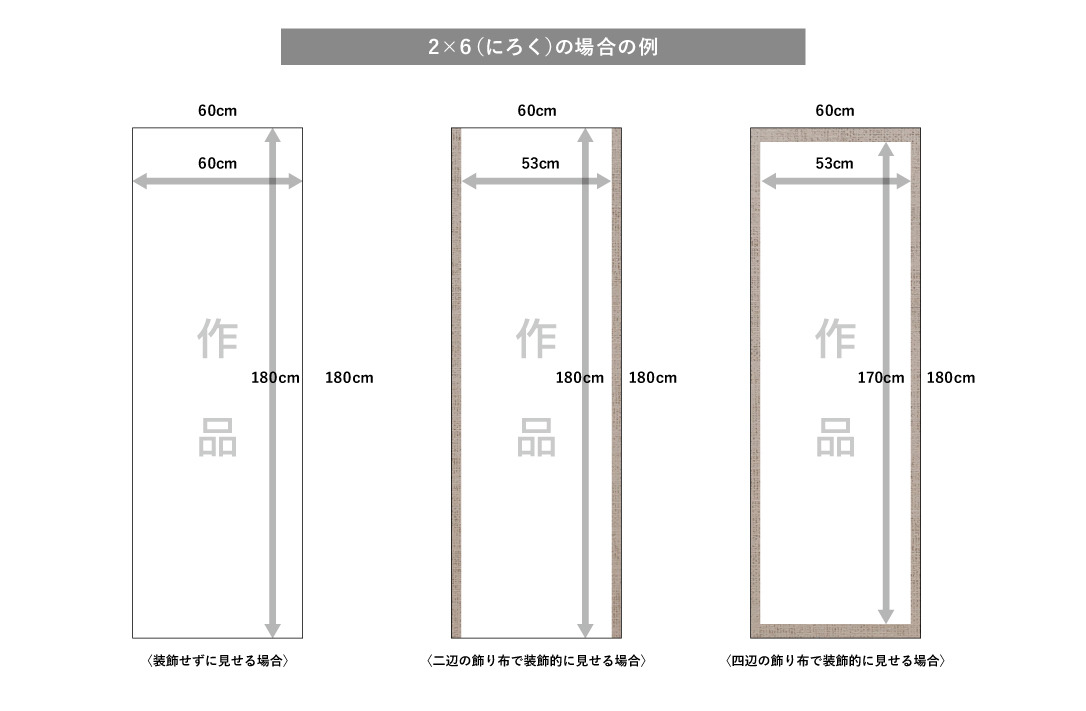
    “Ni-Hachi” typically refers to the frame size used in open exhibitions, which is 2 shaku × 8 shaku, approximately 61 × 242 cm. It’s important to note that the size of open exhibitions refers to the dimensions when framed. If you intend to display your work with a mat showing and use the “Ni-Hachi” frame size, choose a slightly smaller 53 × 228 cm (1.75 shaku × 7.5 shaku) paper. If you plan to fill the frame entirely with your artwork without showing the mat, select a 60 × 240 cm paper.

    “Ni-Roku” (2×6)

    “Ni-Roku” refers to the frame size used in open exhibitions, which is 2 shaku × 6 shaku, approximately 60 × 180 cm. Similar to “Ni-Hachi,” “Ni-Roku” refers to the frame size for open exhibitions. If you intend to display your work with a mat showing and use the “Ni-Roku” frame size, choose a slightly smaller 53 × 170 cm (1.75 shaku × 5.5 shaku) paper. If you plan to fill the frame entirely with your artwork without showing the mat, select a 60 × 180 cm paper.

    You can purchase paper available at Shogu Online here>>

  • Caring for and Cleaning Brushes

    Caring for and Cleaning Brushes

    Taking care of your calligraphy tools is incredibly important. Good brushes can quickly deteriorate if not properly maintained on a daily basis. We’ll introduce you to the proper care methods, so whether you’re new to this or experienced, take a moment to review.

    How to Clean Brushes

    Calligraphy brushes come in various bristle types, sizes, and thicknesses, tailored for different purposes. Here, we’ll outline the cleaning process for two fundamental types: large and small brushes. If you’re interested in learning about how to prepare new brushes, we also have a separate guide for that.

    Cleaning a Large Brush

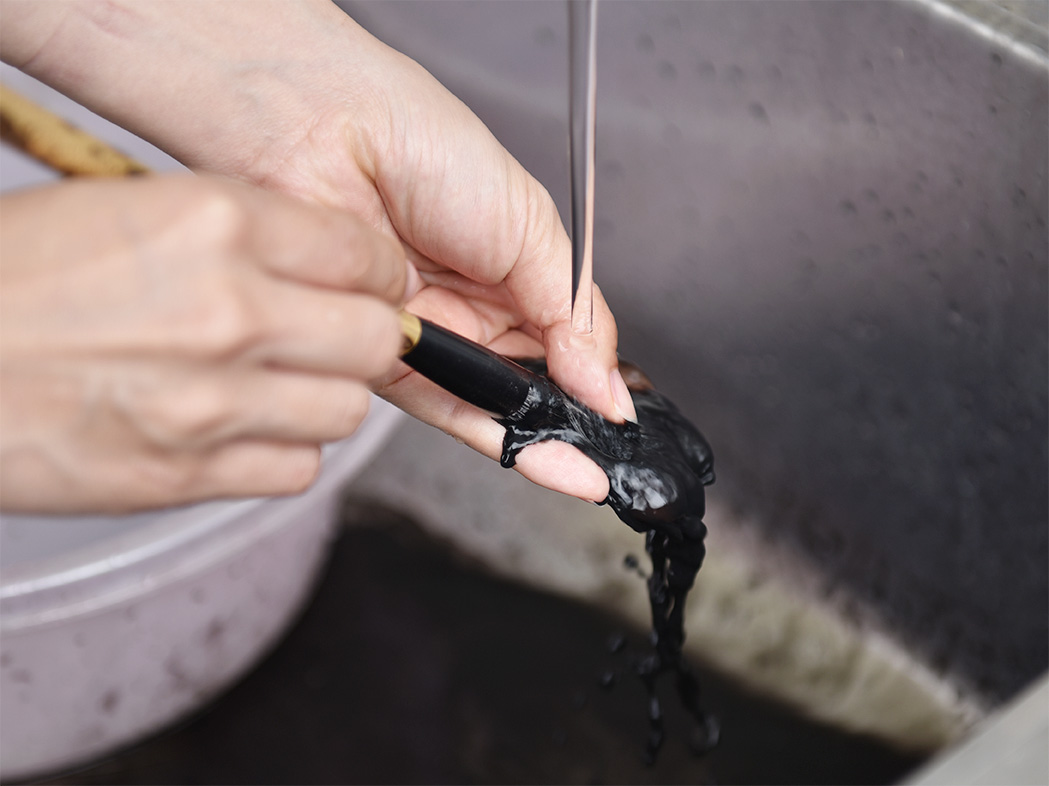
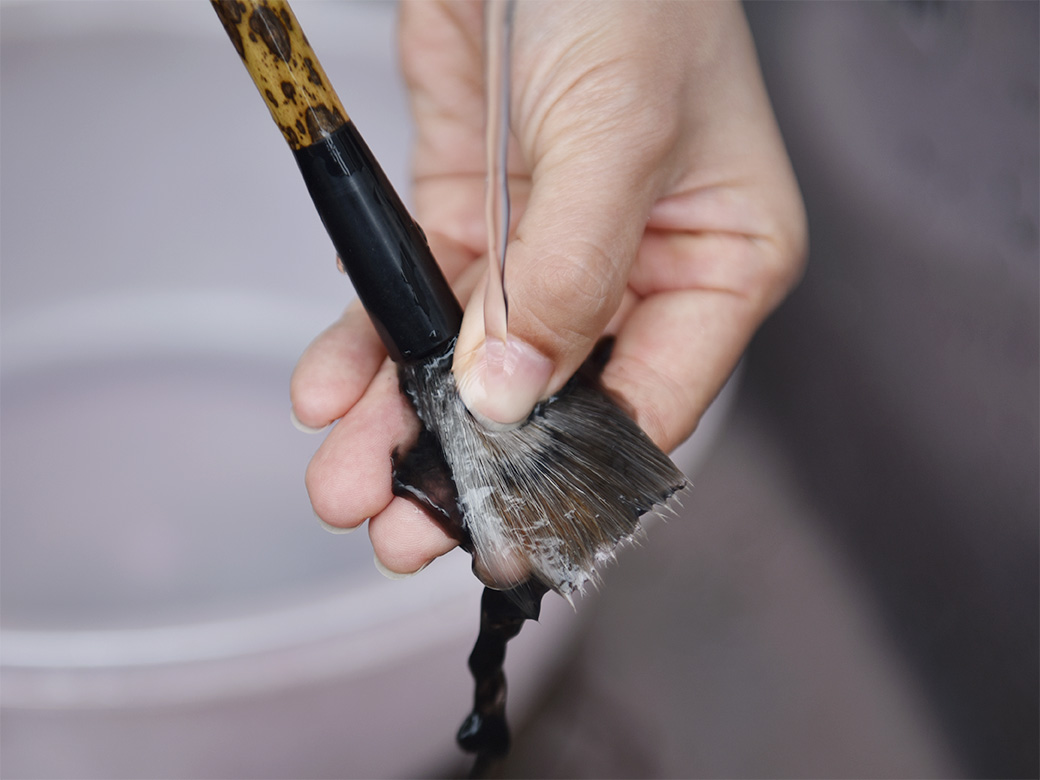
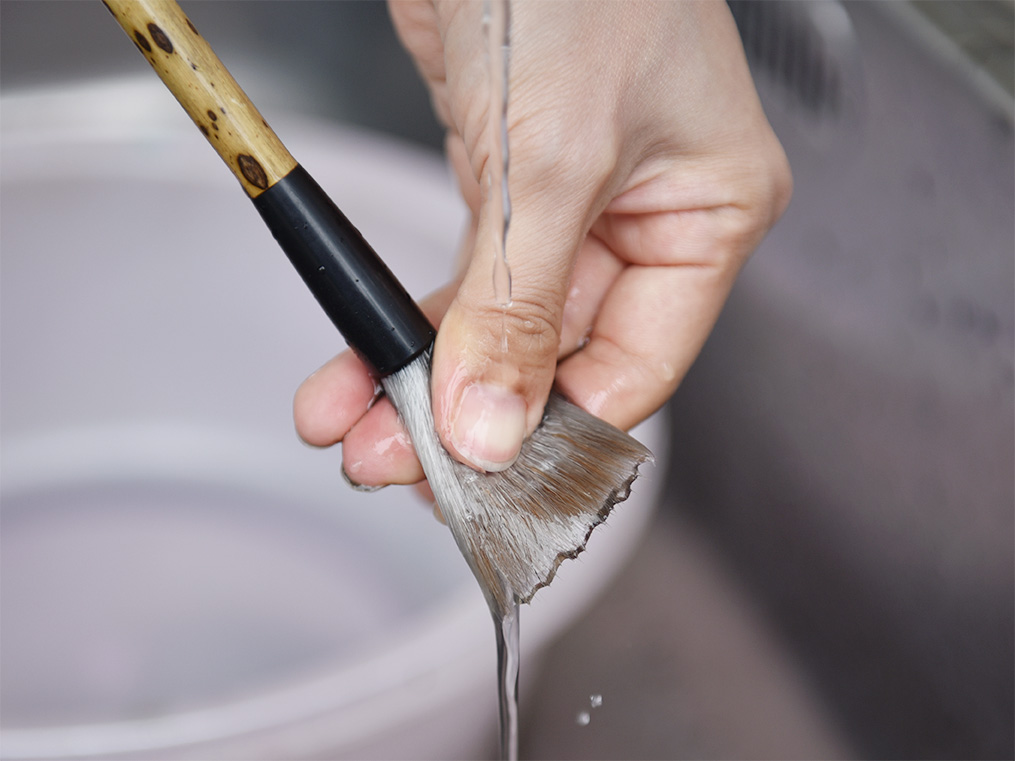
    ①Thoroughly rinse the base of the bristles under lukewarm water, gently massaging them to untangle any knots. You can use either running water or still water for this, but ensure the temperature is around 30 to 40°C (86 to 104°F).


    The bristles of a brush are not visible, but they extend deep into the base where they are inserted. If you can remove the ink that has penetrated into these hidden parts, the bristles are less likely to be damaged, and issues like bristle decay, shedding, or brush cracking are minimized. However, since it’s not possible to directly wash the inner parts, focus on gently massaging the base of the bristles. If you touch it, you might feel some stiffness or resistance. While it might seem like the ink isn’t coming off at first glance, it’s crucial to wash the brush repeatedly multiple times.


    Although you wash it over and over, ink will continue to come out. Please wash it persistently to remove the ink as much as possible.

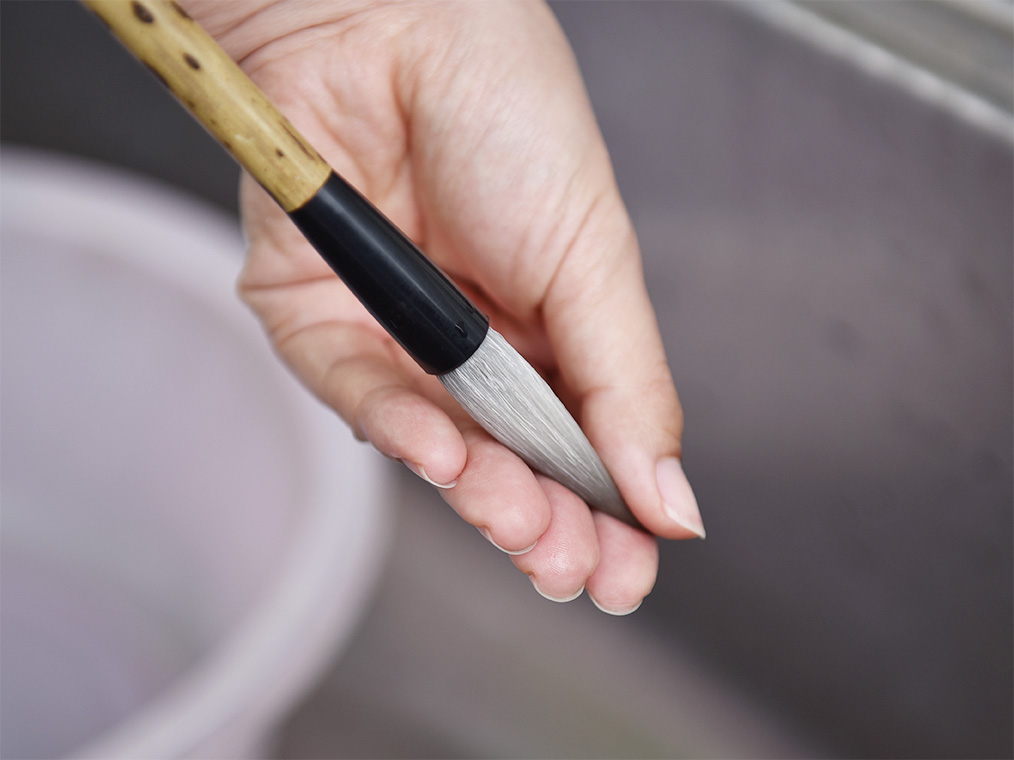
    ②After finishing the washing, gently squeeze the bristles to remove excess water.


    ③ Use your fingers to tidy up the tip of the bristles. Additionally, you can use a brush comb to groom any damaged bristles, which will help the brush look neater after drying.

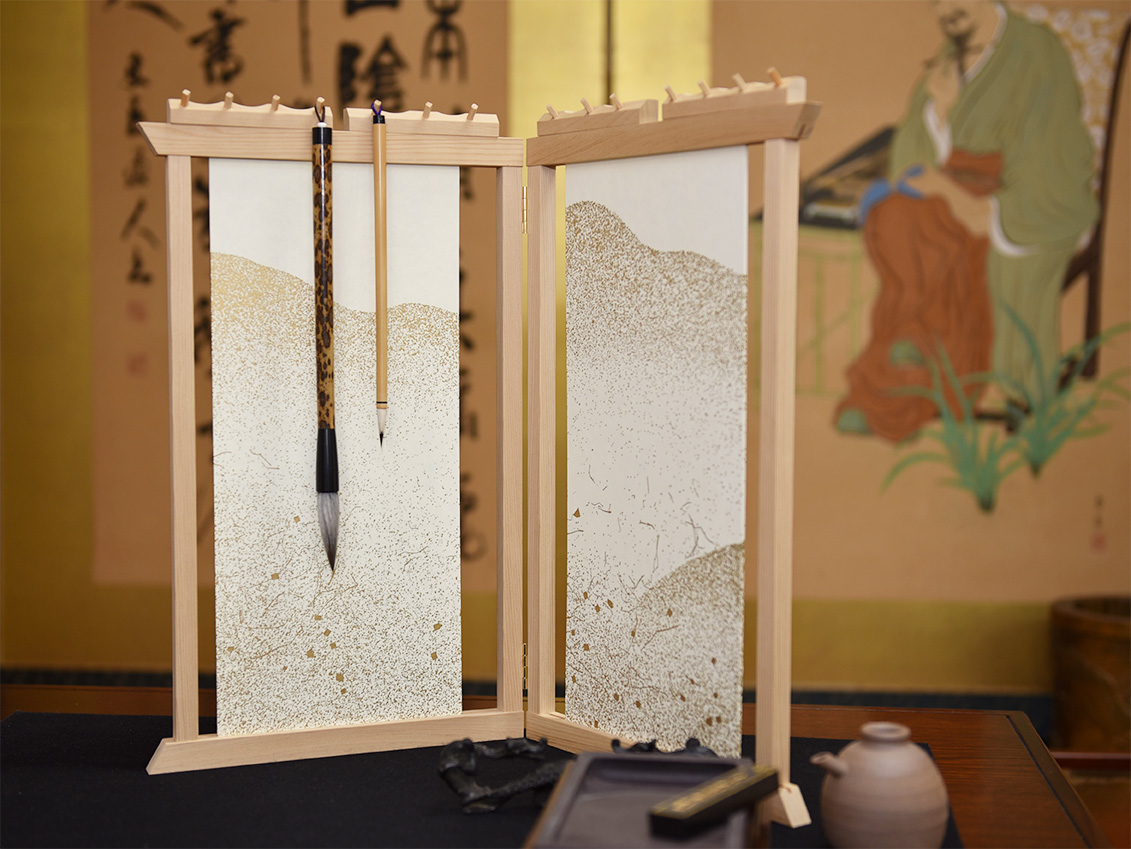
    ④ After finishing the washing, hang the brush on a brush hanger or similar tool to let it air dry naturally. If you start using the brush again before it’s completely dry, the bristle base will remain damp, which can lead to bristle decay. When the bristles decay, shedding and splitting are more likely to occur, and the bristles might even fall out entirely or crack, so please be cautious.


    Cleaning Small Brushes

    Small brushes are typically sold in a state called “gatame fude,” where the bristles are originally bound together with glue. Since only about one-third of the bristles are used for small brushes, there’s no need to wash them after use. Let’s perform maintenance without washing.

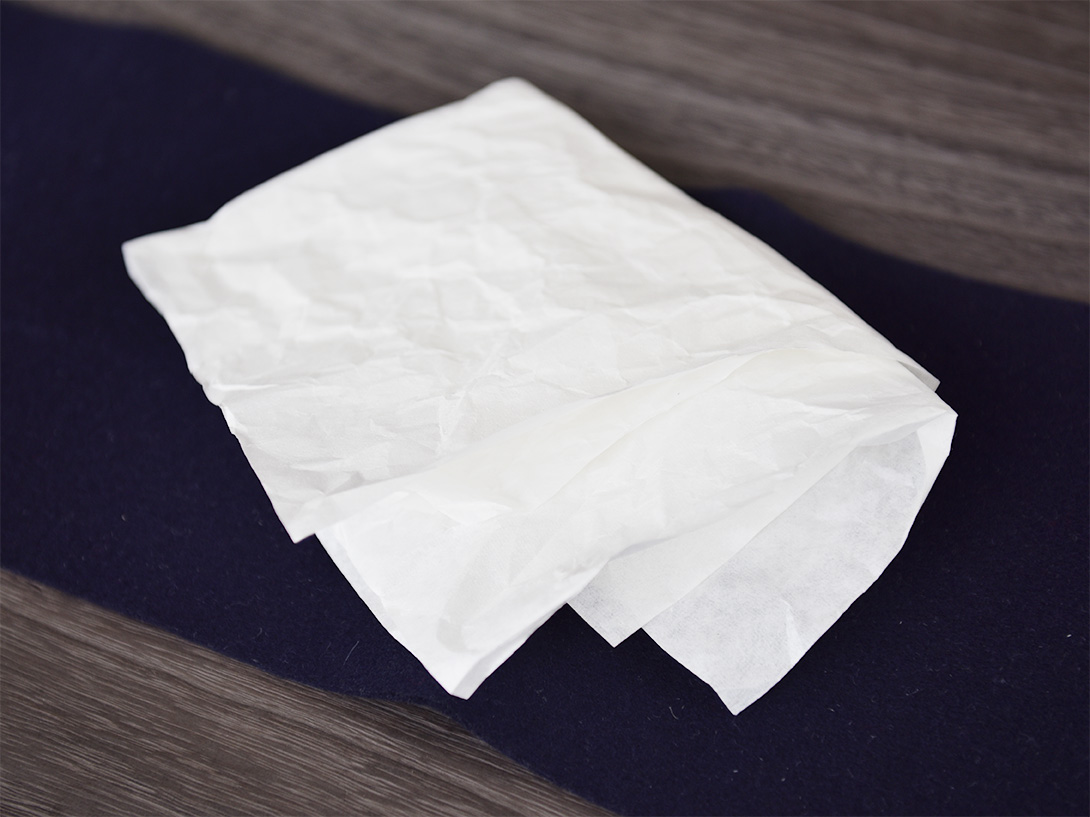
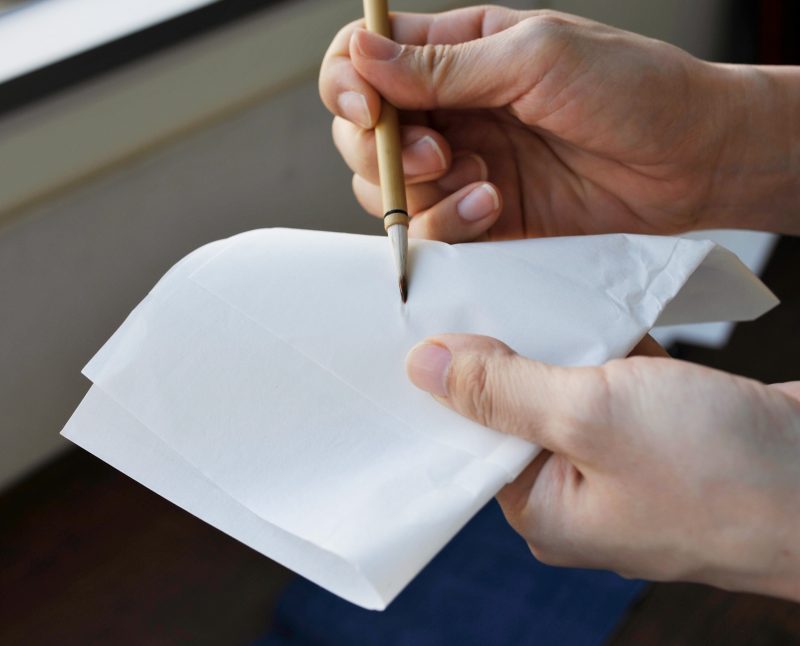
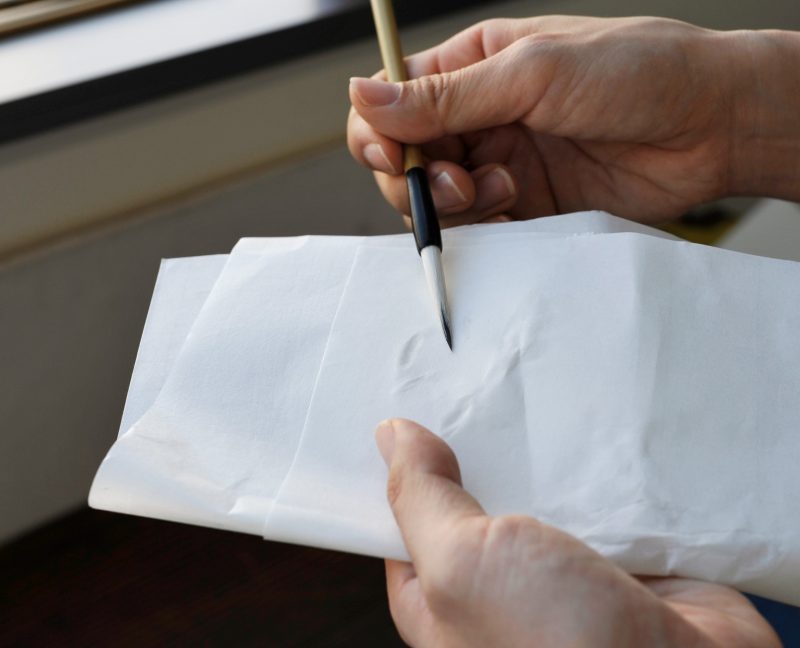
    ① Prepare absorbent paper such as unwanted hanshi paper or tissue paper to soak up moisture.


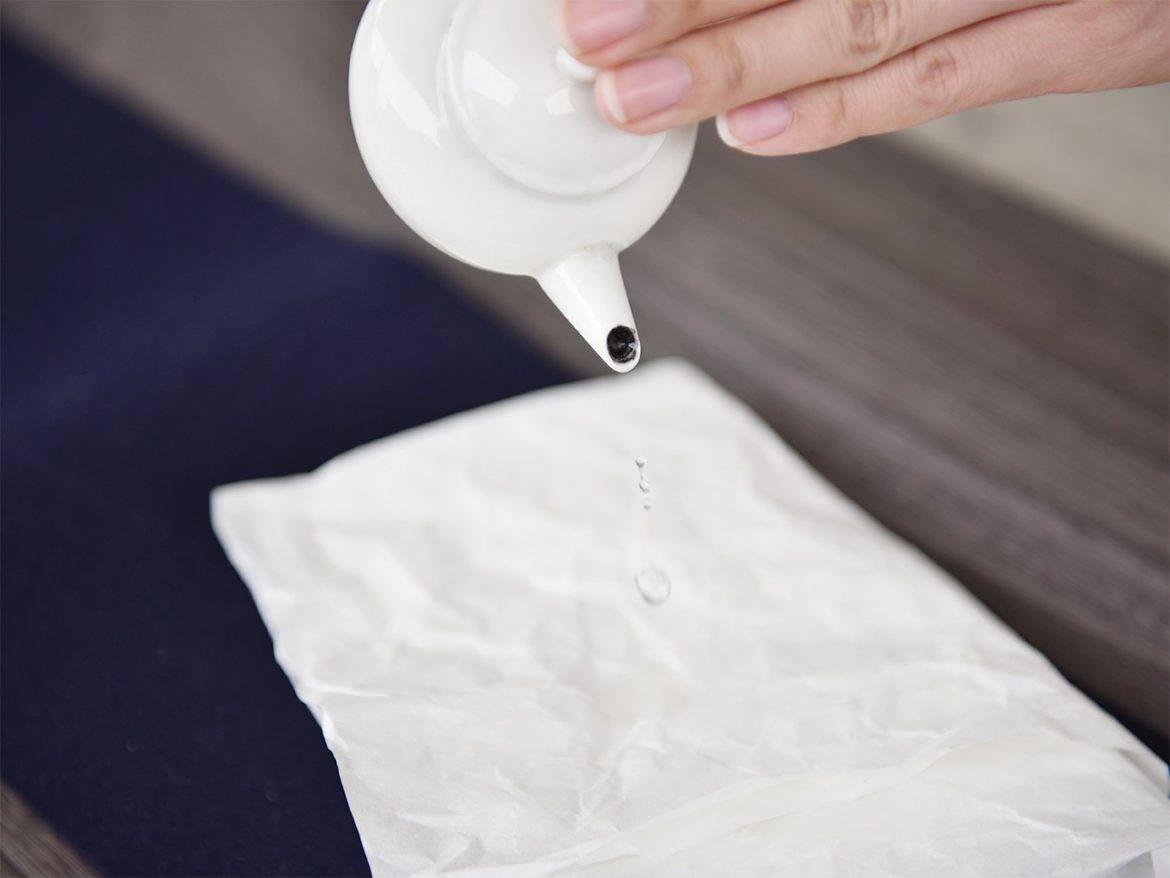
    ② Place a few drops of water onto the prepared paper.


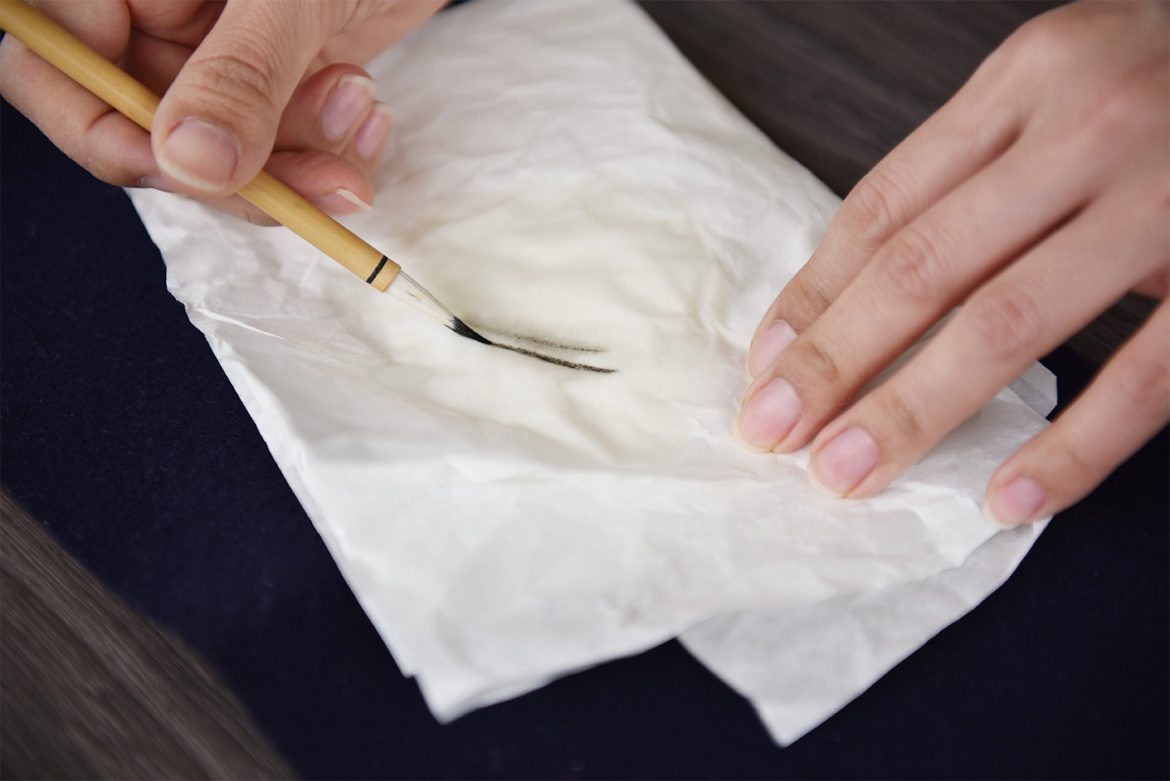
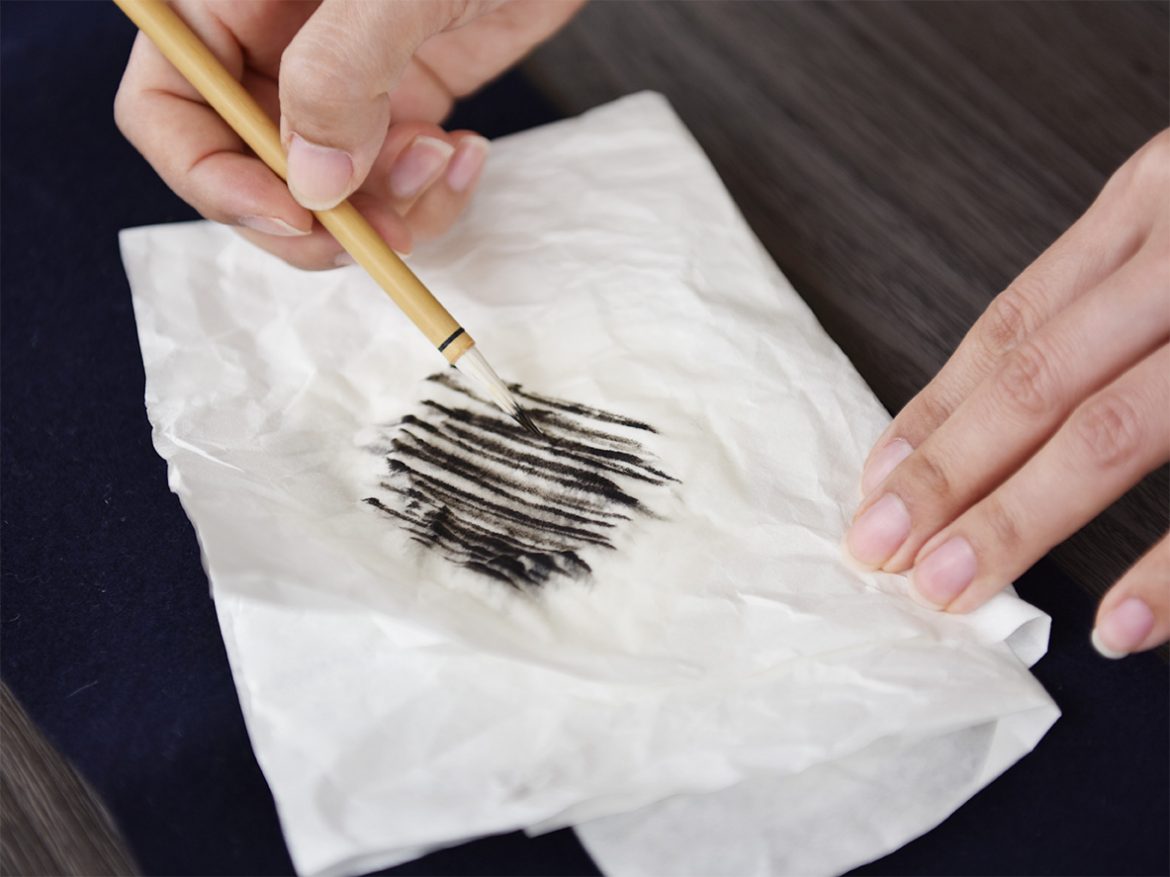
    ③ Lay the tip of the brush on the dampened paper from step ② and gently wipe off the ink. While rotating the brush as if adjusting the tip by resting it on the paper, slowly and carefully wipe off the ink. Ink tends to accumulate at the boundary between the bristles that have been used and the ones that are still bound together, so be cautious while wiping to prevent the bound portion from coming apart. Finish when the ink becomes faint.


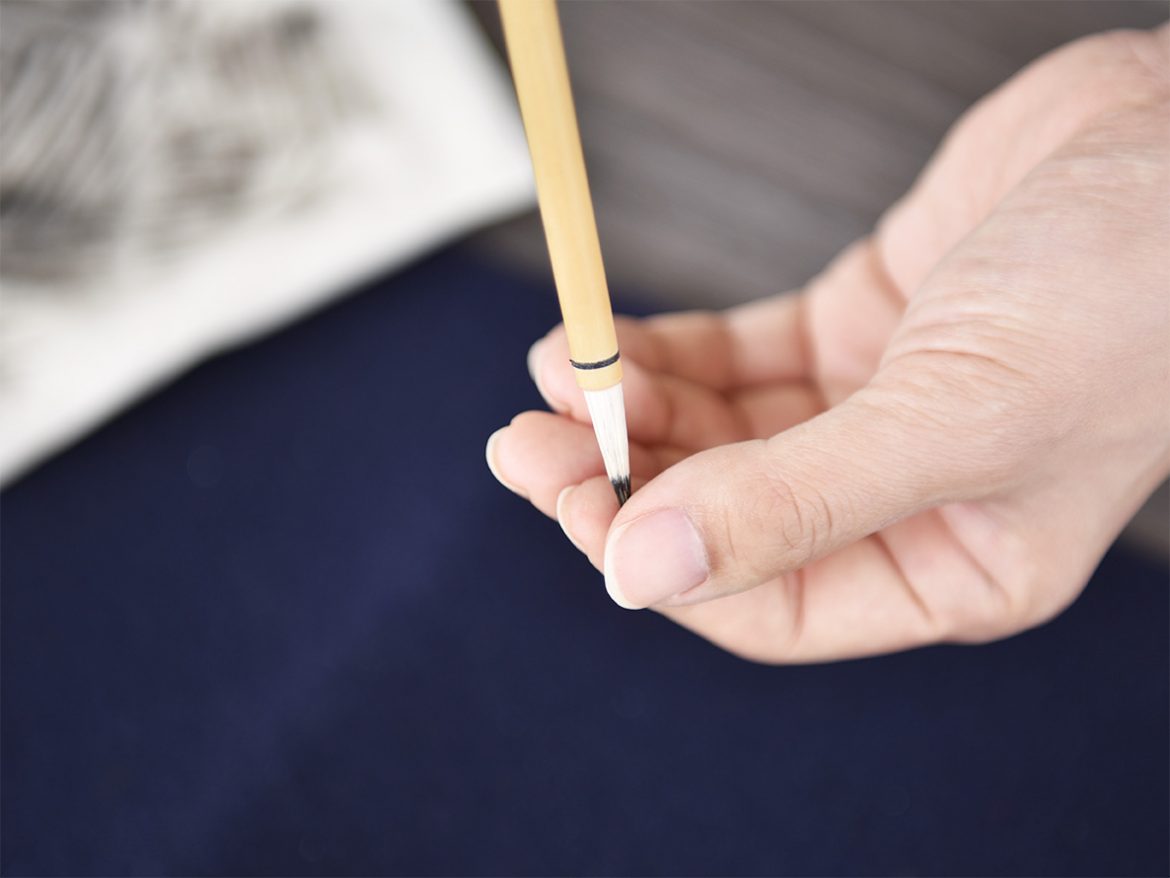
    ④Use your fingers to tidy up the tip of the bristles.


    ⑤After finishing the washing, hang the brush on a brush hanger or similar tool to let it air dry naturally.


    If the small brush becomes too split during maintenance…

    While performing repeated maintenance on small brushes, the bristles can become split all the way down to the base. When this happens, it becomes difficult to write small or thin characters using just the tip of the bristles. In such cases, it’s advisable to wash the entire bristle, and then either use it for other purposes or reapply “brush fixing glue” to solidify the bristles before use.

    Points to note when handling brushes:

    • After using or washing a brush, refrain from capping it as the bristles can deteriorate.
    • Avoid using detergents or other cleaning agents when washing the brush.
    • Handle the brush with care while washing.
    • After finishing washing, ensure the brush is completely dry before using it.
    • It’s advisable to allow the brush to rest intermittently during use.

    To extend the lifespan of your brush, it’s a good idea to have 2 to 3 favorite brushes on hand and rotate their usage. Proper maintenance and treating your cherished brushes with care will ensure their longevity.

  • Raw Materials and Types of Ink

    Raw Materials and Types of Ink

    Raw Materials of Ink

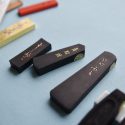
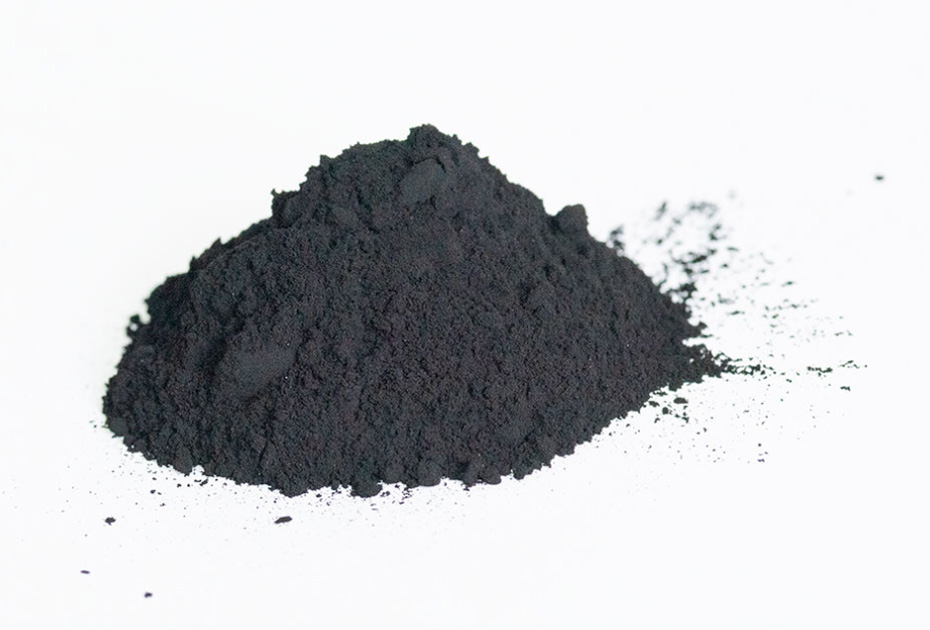
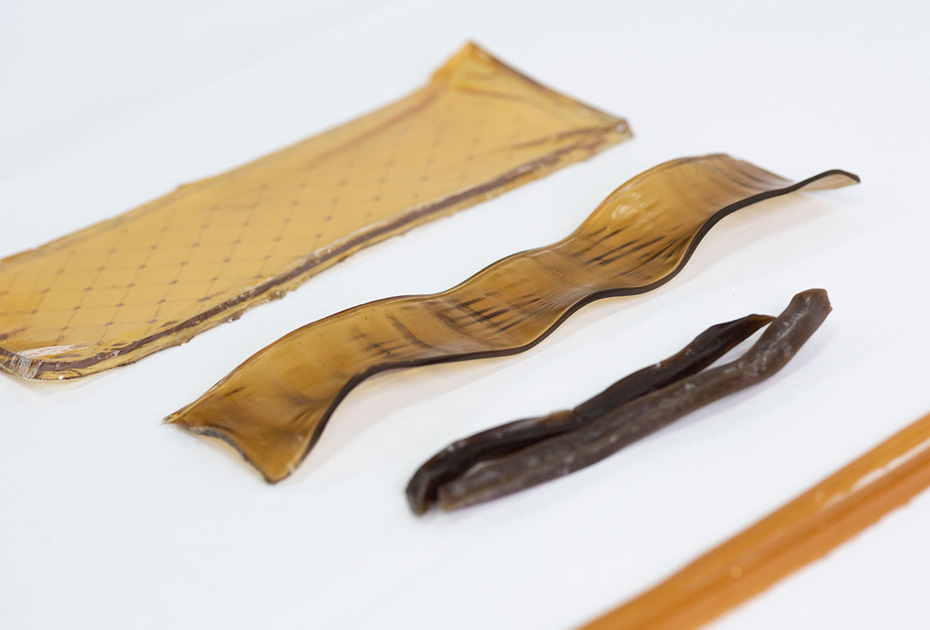
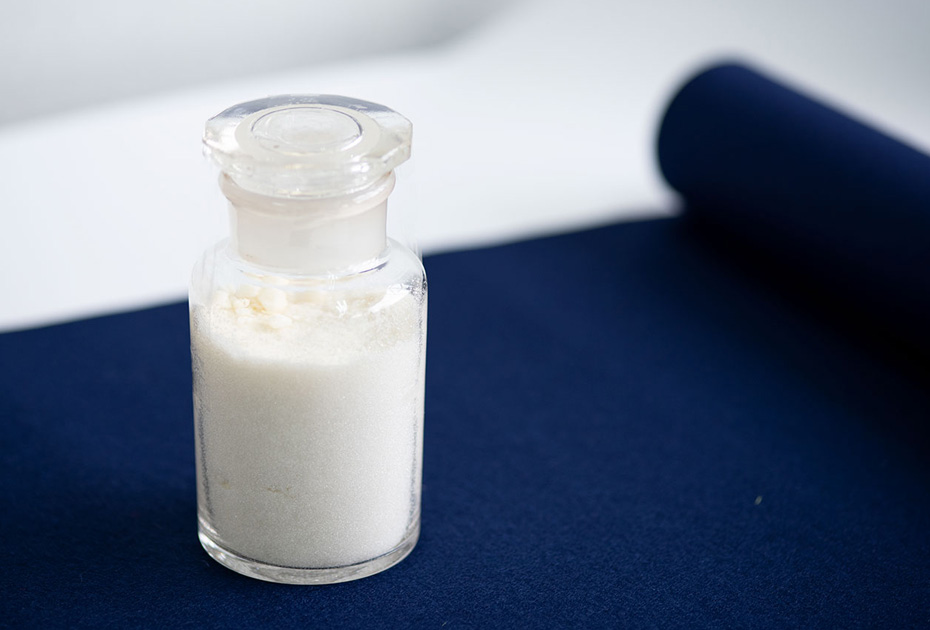
    Ink is made from three main raw materials: “soot” (煤), “nikawa” (膠), and “fragrance.” First, soot and dissolved gelatin are kneaded together, and then fragrance is added. The mixture is then placed into molds and dried to create solid ink.

    About Soot

    There are three types of soot: “oil soot,” “pine soot,” and “modified carbon soot.” The ink made from each type of soot is referred to as “oil soot ink,” “pine soot ink,” and “modified carbon soot ink,” respectively.

    ・Oil Soot: Soot produced by burning plant oils, such as rapeseed oil.

    ・Pine Soot: Soot produced by burning pine branches or bark.

    ・Modified Carbon Soot: Soot produced by burning mineral oil, carbon black, etc.

    煤

    About “nikawa” (膠)

     Nikawa is obtained by boiling and extracting proteins such as collagen from the skin, bones, and sinew (the intermediate tissue between the skin and flesh) of animals like cows, horses, and deer. After extraction, it is dried to form gelatin. When making ink, gelatin is melted in a water bath and used. In the ink production process, gelatin plays a role in solidifying the powdered soot, and in the ground ink, it stabilizes the soot on the paper’s surface.

    膠

    About Fragrance

    Fragrance is used to mask the distinctive odor of gelatin. Additionally, this fragrance has a secondary effect of calming the mind of the ink grinder.

    Dragon’s blood (龍脳) and musk (麝香) are representative fragrances used for this purpose.

    香料

    Types of Ink

    Ink is classified into “Oil Soot Ink,” “Pine Soot Ink,” and “Modified Carbon Soot Ink” based on the type of soot used.

    ■Oil Soot Ink

    To produce oil soot ink, vegetable oils such as rapeseed oil, sesame oil, tung oil, and camellia oil are placed in a clay vessel. A lampwick made of rush grass (いぐさ) is ignited, and the clay vessel is covered to collect the soot deposited inside. The soot in oil soot ink has fine and uniform particles. It is mixed with dissolved gelatin, kneaded together with fragrance, and then placed into molds and dried to create the ink.

    While the art of making ink was introduced to Japan from China, oil soot ink is believed to be a type of ink that Japan developed first. Even today, excellent oil soot ink continues to be produced.

    One of the manufacturers of oil soot ink is “Kobai-en” in Nara, which is the only place in Japan that produces oil soot ink through the traditional method of “collecting soot.”

    Note: The term “modified carbon soot ink” refers to the ink made from the modified carbon soot mentioned earlier in the text.

    Feature Article: “Dedicated to the Art of Ink Making – The Traditional Process at Kobai-en”>>

    ― Characteristics of Oil Soot Ink ―

    In contrast to pine soot ink, oil soot ink exhibits a glossy appearance when ground. In its concentrated form, it appears black, but in its diluted form, it takes on a reddish-brown hue.

    Oil soot ink is nearly free from impurities, and its particles are fine and uniform, making it well-suited for producing ink of normal to concentrated densities. The fine particles result in a smooth texture on the inkstone, and as the quality of the oil soot ink improves, this glossy appearance becomes more pronounced.

    Regarding ink color, the following characteristics are observed: [further details to be provided below].

      High-Quality Oil Soot Ink Poor-Quality Oil Soot Ink
     Concentrated Ink  A glossy and deep lacquer black with a sense of depth. Lacks the deep black luster, exhibiting a reddish or whitish brown ink color.
     Diluted Ink

    A light brown with hints of purple or blue tones. It provides a fine gradation and three-dimensional effect.

    (The color may vary depending on the type of vegetable oil used.)

    Has a coarse texture with no three-dimensional effect.

    ■About Pine Soot Ink

    There are two types of pine soot ink: “Ikimatsu Pine Soot Ink” and “Ochimatsu Pine Soot Ink.” “Ikimatsu Pine Soot Ink” is made from the soot produced by scraping the bark of living pine trees, while “Ochimatsu Pine Soot Ink” is made from the soot produced by burning dried pine wood, which contains more pine resin. To collect the soot for pine soot ink, the part of the pine tree that exudes resin is cut into small pieces, dried, and then burned inside a room. The soot that settles on the walls and ceiling is collected for use. This soot is mixed with dissolved gelatin, kneaded together with fragrance, placed into molds, and dried to create the ink. This manufacturing process is the oldest method of ink production, originating from ancient China and later transmitted to Japan.

    Currently, with oil soot ink becoming the mainstream and the scarcity of high-quality pine, pine soot ink is treated as a precious commodity.

    ― Characteristics of Pine Soot Ink ―

    In contrast to oil soot ink, pine soot ink lacks a glossy appearance when ground and is said to transition from black to blue as it ages. The uneven particles of soot beautifully depict delicate gradations in diluted ink. In concentrated ink, it exhibits a subdued luster, while in diluted ink, it offers a transparent and exquisite hue. Pine soot ink is considered to have excellent effects when used as a background in the calligraphy of ancient brushes and ink paintings.

    ■Modified Carbon Soot Ink

    Modified carbon soot ink, also known as Western ink, is made from materials such as mineral oil and carbon black. It is commonly used in practical ink and affordable products. One of its characteristics is that it “darkens quickly” compared to pine soot ink and oil soot ink. However, it may be said that it lacks the natural charm of ink, which “shines in seven colors.”
    While modified carbon soot ink may be considered inferior to pine soot ink and oil soot ink, using it is recommended for preserving the longevity of brushes and inkstones.


    Popular Oil Soot Ink at Shoyu Online

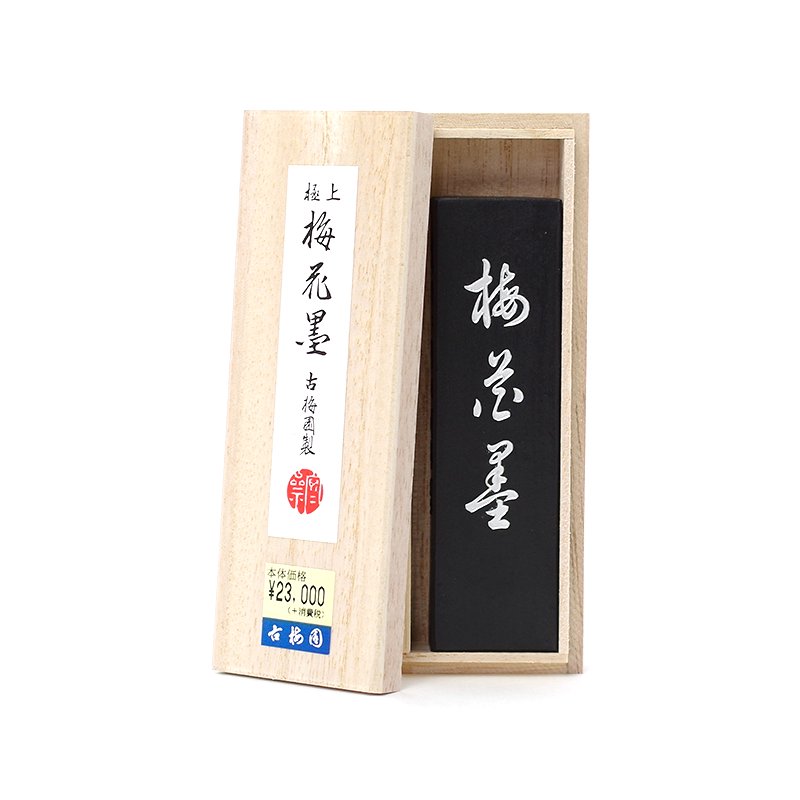
    梅花墨

    1. 梅花墨 大 3.0丁型(古梅園)

    This is the finest oil soot ink made with rapeseed oil, featuring the finest particles. It has a substantial weight and appears pure black in concentrated form, while in diluted form, it contains a hint of light purple. It has excellent flow and is perfect for Chinese characters and kana works.

    View Product Page
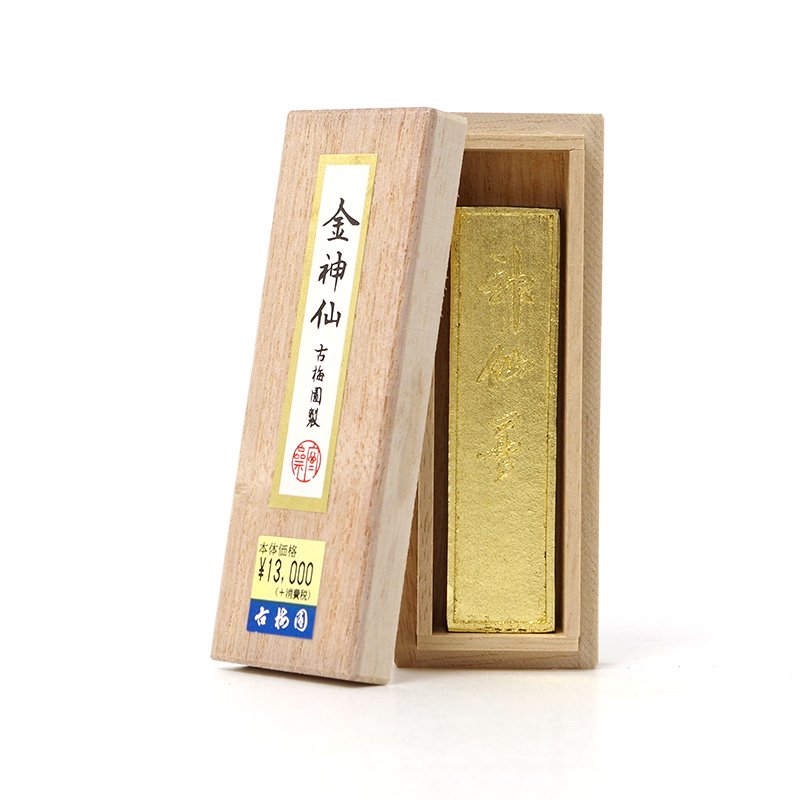
    金神仙

    2. 金神仙 1.5丁型(古梅園)

    This is the finest rapeseed oil soot ink. In its concentrated form, it appears glossy and pure black, while in diluted form, it takes on a black hue with brown tones. It is suitable for Chinese character works, kana calligraphy, and sutra copying.

    View Product Page
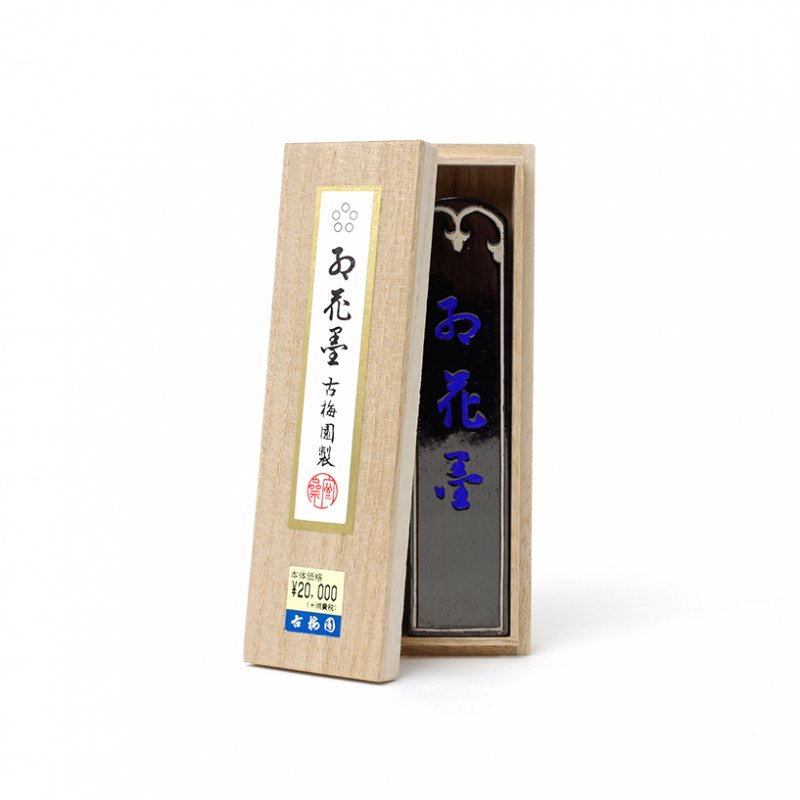
    紅花墨

    3. 五星 紅花墨 5.0丁型(古梅園)

    This is oil soot ink made with rapeseed oil, known for its excellent flow. In its concentrated form, it exhibits a beautiful black color resembling ink, while in diluted form, it appears as a grayish hue.

    View Product Page

    Popular Blue Ink and Pine Soot Ink at Shoyu Online

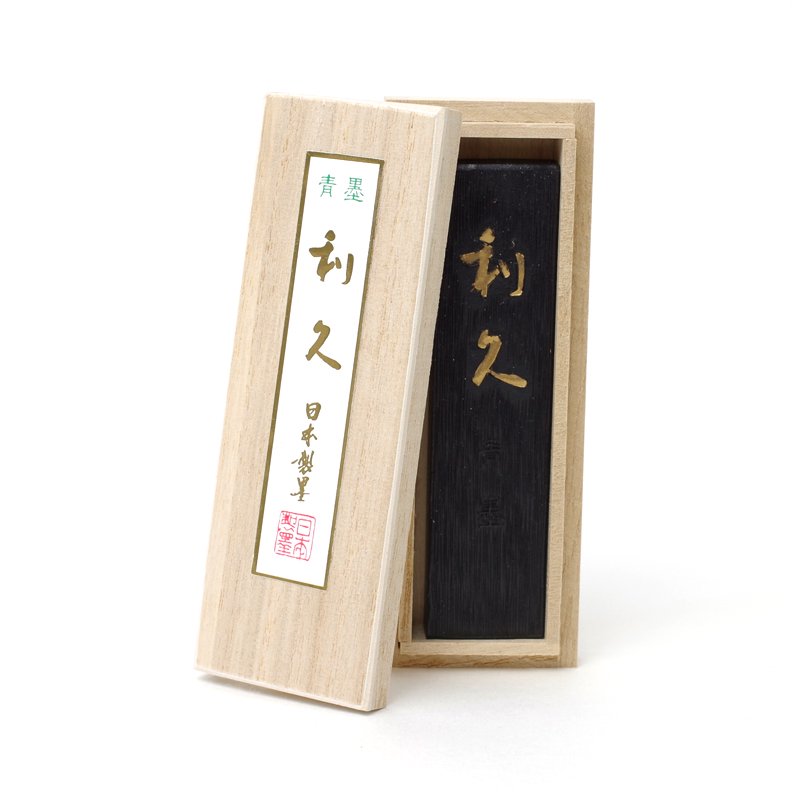
    利久

    1. 利久 1.5丁型(日本製墨)

    This pine soot ink is created by blending vegetable-based indigo with our other ink, resulting in a pine soot ink with a more pronounced blue tint. It is a premium concentrated blue ink that has been carefully adjusted to suit the preferences of calligraphers and artists.

    View Product Page
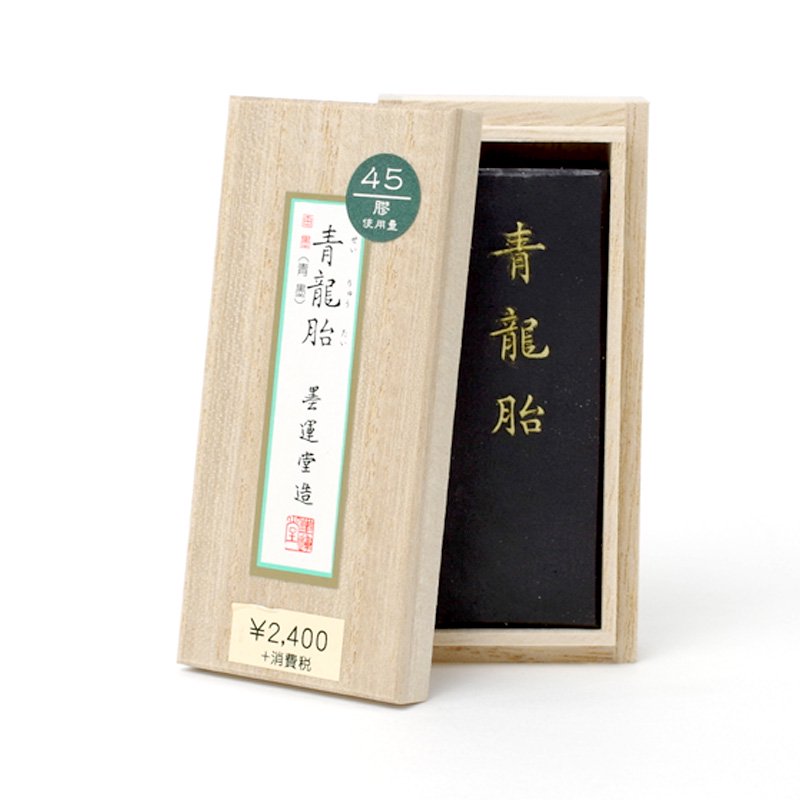
    青龍胎

    2. 青龍胎 1.5丁型(墨運堂)

    It allows for layering without shining, offering the ability to freely express gradations and create artworks with depth and a sense of distance in the ink color. It is recommended for practicing e-tegami (Japanese picture letters) and sumi-e (ink wash painting).

    View Product Page
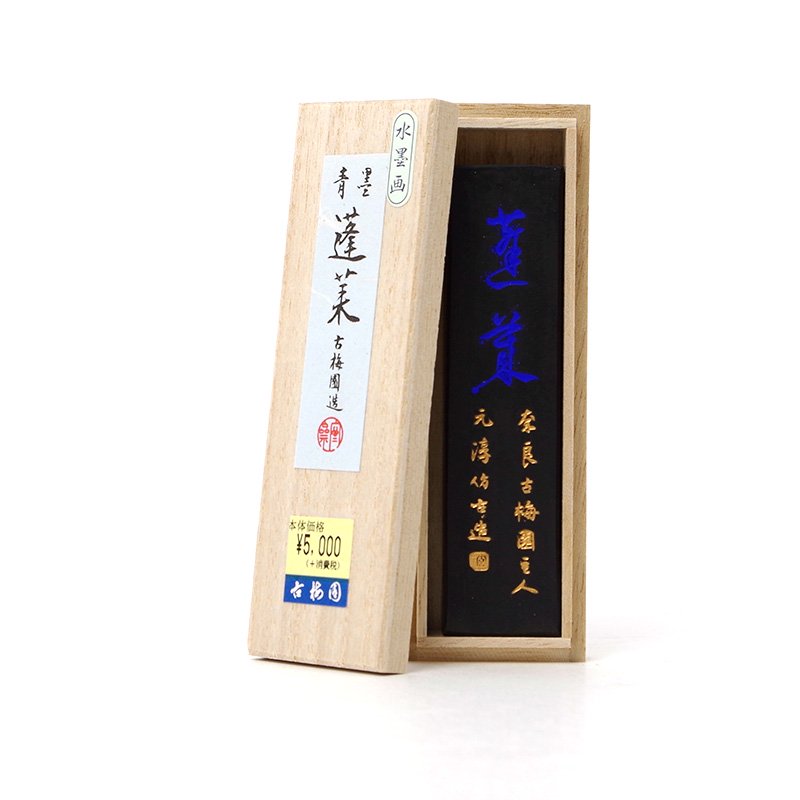
    蓬莱

    3. 蓬莱 2.0丁型(古梅園)

    Oil soot ink, developed through over 400 years of ink making, is used for blue ink and made solely from soot. In diluted form, it leans towards a grayish hue with a touch of blue, evoking a sense of weight and suitable for sumi-e (ink wash painting), haiga (haiku painting), and other art styles. 

    View Product Page

    Summary

    We have introduced the raw materials and types of ink. Ink is made from three main raw materials: “soot” (煤), “Nikawa” (膠), and “fragrance.” It is classified into “Oil Soot Ink,” “Pine Soot Ink,” and “Modified Carbon Soot Ink” based on the type of soot used. Each type of ink has its own characteristics, so please choose according to the artwork you want to create.

    Check out the “Ink” products available at Shoyu Online here»

  • Choosing an Inkstone

    Choosing an Inkstone

    The inkstone plays a crucial role in obtaining a good ink color. As they say, “an inkstone is a lifelong item,” so try to choose a high-quality inkstone that fits your budget. Depending on your purpose and available space, selecting the size of the inkstone can be a good approach. Additionally, different stones used in inkstones have their unique characteristics, so you may also consider choosing one based on your preferred stone type.

    Inkstone Size

    The unit used to indicate the size of an inkstone is in inches, where 1 inch is approximately 2.5 cm. Although there may be slight variations depending on the manufacturer, inkstones generally come in the following sizes:

    3 inches: Vertical 7.5 cm × Horizontal 6.0 cm

    4 inches: Vertical 10.0 cm × Horizontal 7.0 cm

    5 inches: Vertical 12.5 cm × Horizontal 8.5 cm

    6 inches: Vertical 15.0 cm × Horizontal 10.0 cm

    7 inches: Vertical 17.5 cm × Horizontal 11.5 cm

    8 inches: Vertical 20.0 cm × Horizontal 13.0 cm

    9 inches: Vertical 22.5 cm × Horizontal 14.5 cm

    10 inches: Vertical 25.0 cm × Horizontal 16.5 cm


    Additionally, in the world of Japanese inkstones, there are traditional expressions used to indicate their sizes, such as “Shigohira” (四五平) or “Gosanzun” (五三寸).


    “Nigotabi” (二五度) – 7.5cm (height) x 4.5cm (width)

    “Sango-tabi” (三五度) – 10.5cm (height) x 4.5cm (width)

    “Shinisu” (四二寸) – 12.0cm (height) x 6.0cm (width)

    “Shigohira” (四五平) – 13.5cm (height) x 7.5cm (width)

    “Gosanzun” (五三寸) – 15.0cm (height) x 9.0cm (width)

    “Koshirouku” (小四六) – 16.5cm (height) x 10.5cm (width)

    “Seishirouku” (正四六) – 18.0cm (height) x 12.0cm (width)

    “Ooshirouku” (大四六) – 19.5cm (height) x 13.5cm (width)


    Names of Different Parts of the Inkstone

    The surface of the inkstone is referred to as the “Kenmen” (硯面), and the backside is called the “Ken’in” (硯陰).

    Choosing an Inkstone

    Selecting by Size

    For kana or practical writing: 3 sun to 5 sun (approx. 7.5cm to 12.5cm) For kanji on hanshi or kana strip: 6 sun to 7 sun (approx. 15.0cm to 17.5cm) For kanji with wider lines: 8 sun to 10 sun (approx. 20.0cm to 25.0cm) (* If you often carry it for practice, having a separate inkstone for portable use can be convenient. Please note that the above sizes are rough guidelines.)

    Choosing based on Stone Characteristics

    Inkstones are named according to their place of origin. Each stone has different colors and characteristics, so be sure to find an inkstone that suits your preferences.

    ■雄勝硯(Ogatsu Suzuri)

    Ogatsu Suzuri is a representative type of inkstone made in Miyagi Prefecture, which is a well-known production area for traditional Japanese inkstones.

    Made from black, hard, and compact slate, it possesses excellent luster and uniformity of particles. Its unique characteristics include being pure black, strong against compression and bending, low water absorption rate, and resistance to chemical reactions and long-term deterioration.

    Due to the devastating impact of the Great East Japan Earthquake on March 11, 2011, the representative production areas of traditional Japanese inkstones were severely affected. As a result, the stone is currently sourced from Anhui Province and then processed and shipped from areas including Sendai City, Ishinomaki City, and Ogatsu Town in Miyagi Prefecture.

    Currently, Ogatsu Suzuri is referred to as “Ogatsu Kakou Suzuri” and sold under this name.


    ■細羅紋硯(Sairamonken)

    An affordable inkstone that grinds ink well.

    This inkstone is sourced from the Longwei Mountain area in Jiangxi Province, China, and along the Furong River. It is made by vertically splitting the thin-layered rock material and finishing it into an inkstone, characterized by fine and delicate cross-grain patterns (Sairamon, 羅紋). Due to its affordability and excellent ink-grinding properties, it is highly recommended for beginners.


    ■宋坑端渓硯(Songkeng Duanxi)

    An appealing choice for beginners due to its affordable price.

    This inkstone is sourced from the Axe Ke Mountain area in Gaoyao County, Zhaoqing City, Guangdong Province, China. Among the Duanxi inkstones, it is known for its most reasonable price. It features a brownish stone color, and the stone material is relatively hard, allowing for quick ink grinding. However, be cautious of inkstones with a very shiny surface or a strong reddish hue, as they often indicate an extremely hard stone material, requiring special attention.


    ■新麻子坑端渓硯(Shinmashikou Duanxi)

    Beautiful deep purple stone color with exquisite stone patterns.

    One of the three famous mines, Shinmashikou, is sourced from the Axe Ke Mountain area in Gaoyao County, Guangdong Province, China. It is renowned for its beautiful luster and deep purple stone color, which makes its stone patterns highly desirable. The variety of patterns is second only to Laozi inkstones, and it excels in ink grinding as well. The stone’s fine texture and patterns are remarkable features.

    Please note that the stone does not have a very strong hardness, so it is essential to take care of the inkstone regularly.


    ■坑仔巌端渓硯(Koushigan Duanxi)

    A stone material with excellent fine texture that grinds ink well.

    Sourced from the Axe Ke Mountain area in Gaoyao County, Guangdong Province, China, this inkstone is located on the southern slope of Lao Keng, which is why it bears a strong resemblance to the Lao Keng Duanxi inkstone. Although it tends to be relatively smaller in size, it boasts an ink-absorbing stone material with a remarkably fine texture, and some inkstones exhibit a stone pattern called “Gan” (眼). The stone color is mainly reddish-purple, and compared to the Lao Keng Duanxi inkstone, it produces a sound similar to metal due to the drier nature of the stone.


    ■老坑端渓(Lao Keng Duanxi)

    The Finest Grade of Duanxi Inkstone

    Sourced from the Axe Ke Mountain area in Gaoyao County, Guangdong Province, China, this inkstone is considered the finest grade among Duanxi inkstones. Some of these inkstones can be quite expensive, reaching tens of thousands of yen, and many of them exhibit a pale purple color. They are excellent for grinding ink, providing a smooth and fluid sensation as the ink dissolves while grinding.

    When wet with water, some inkstones reveal various patterns. Although historically known as the top-quality Duanxi inkstone, the mining of this stone has now been discontinued, making it difficult to obtain larger ones.

    Choosing Based on Appearance

    Inkstones come in various colors, shapes, and carvings, and no two high-quality inkstones are exactly alike. Some people may be torn between choosing an oval-shaped or square-shaped one, but it’s entirely up to your personal preference. The choice of carvings is also subjective; some may prefer inkstones with carvings, while others may prefer plain ones. There is no right or wrong choice – simply pick what you like.

    Choosing Based on ‘Houbou’ (鋒鋩)

    The countless fine irregularities on the inkstone’s surface are referred to as “Houbou” (鋒鋩), and they play an essential role as the “file” in grinding ink. A good-quality inkstone is characterized by fine and smooth Houbou, allowing for easy grinding of high-quality ink.

    Please note that Houbou is not permanent. If it wears down and makes ink grinding difficult, you will need to use a dedicated whetstone to re-sharpen the Houbou. Also, nowadays, many inkstones are cosmetically enhanced for display purposes, making it challenging to judge the actual Houbou just by touching them. When using an inkstone with cosmetic enhancements for the first time, sharpening it with a whetstone can significantly improve its ink-grinding performance.

    Choosing Based on Weight

    When uncertain about which inkstone to purchase, go for the heavier one. The weight can serve as a reference for judging the tightness of the inkstone’s pores, which is not easily discernible by appearance alone.

    Conclusion

    Grinding excellent ink with a top-quality inkstone is the ultimate luxury. By cherishing your choice of inkstone, you can grind ink effortlessly and produce deep and rich ink. At Shogu Online, we offer a wide range of inkstones in different sizes, types, and price ranges. Find your favorite inkstone here.

    Inkstones available for purchase at Shoyu Online are here.»

  • How to grind ink

    How to grind ink

    Beautiful ink is created by gently and slowly grinding it with a weak force.

    To bring out the true color of the ink, it is considered most important to use freshly drawn water and gently grind the ink with only the weight of the ink on the inkstone, slowly and with a weak force.

    The act of “grinding ink” is not merely about creating ink liquid but also regarded as an important practice that allows one to find tranquility through the pleasant fragrance and faint grinding sound of the ink. It offers a chance to calm the mind and experience a serene excitement while contemplating the ink color, brushes, and paper, nurturing creative ideas.

    Throughout history, it has been said that “it is good for the sick and young girls to grind ink” and “ink should be ground with the weight of the ink only.” These statements reflect the idea that enjoying the tactile sensation of ink and inkstone without exerting force is desirable.

    This appreciation for the joy of carefully grinding ink is believed to have been cherished by our ancestors, who deeply loved the four treasures of the study (writing brush, ink stick, inkstone, and paper) and understood the value of spending time to relish the process.

    How to grind ink

    There are actually several methods of grinding ink, and they can be divided into three categories based on their purpose. Let me explain them in a straightforward manner. Each method has slightly different characteristics, so consider the type of ink you want to create and choose the appropriate grinding method.

    General Ink Grinding Method:

    In daily calligraphy practice, it would be ideal to take your time and carefully grind good-quality ink. However, we understand that it might not always be possible. Therefore, let us introduce a common and efficient method for grinding ink.

    〈The steps are as follows:〉

    Step 1: Drop water on the surface of the inkstone, about the size of a 10 yen coin.

    Step 2: Calm your mind and start grinding the ink slowly.

    Allow the water droplet and the ink to gradually mix together, and continue patiently until it reaches a certain level of concentration. As you progress with the grinding, the ink will become sticky, and there will be a moment when a pleasant fragrance of ink wafts up. This is said to be an indication of the completion of the grinding, but it’s best to adjust the concentration to your preference.

    Step 3: Once the ink has been ground, add a small amount of water again and continue grinding. Repeat this process until the ink naturally flows away into the “sea” of the inkstone. The “sea” of the inkstone is the place for mixing, so be sure not to grind the ink in the “sea.”

    Step 4: Repeat steps ① to ③ until you have the required amount of ink. Add water gradually and create the desired consistency while controlling the brush strokes.

    Once you finish grinding the ink, carefully wipe off any remaining moisture from the inkstone using a cloth or paper. After cleaning it, store the ink properly in a paulownia box for preservation.


    When you want to create light ink:

    Light-colored ink with a soft impression is also used in watercolor painting. Here’s how to grind ink when you want to create light ink.

    〈Procedure〉

    ① Drop a small droplet of water on the surface of the inkstone. When you want to create light ink, a very small amount of water is sufficient.

    Step 2: Calm your mind and start grinding the ink slowly. Allow the water droplet and the ink to gradually mix together, and continue patiently until it transforms from a muddy consistency to a sticky state. As you progress with the grinding, there will be a moment when a pleasant fragrance of ink wafts up. Enjoy the various transformations of the ink. Once it reaches the sticky state, the process is complete.

    〈Grinding Process〉

    〈Muddy state〉


    〈Sticky state〉

    Step 3: Prepare a sufficient amount of water in a separate container for dilution. A plate or dish can be used as a container. The required amount may vary depending on what you are writing, so it’s good to consider the overall quantity needed and prepare the container accordingly. Step 4: Drop the concentrated ink from Step 2 into the container with water and mix it well. Gradually add the concentrated ink and adjust while checking the color to create light ink.

    Step 5: Once you achieve your preferred level of concentration, your light ink is complete.

    After finishing the grinding process, carefully wipe off any remaining moisture from the inkstone using a cloth or paper. Then, store the ink properly in a paulownia box after proper maintenance.


    When you want to make good ink:

    To bring out the true color of the ink, it is essential to create fine particles of ink. Fine particles of ink spread delicately in water and blend easily. They also influence the color of the ink when applied to paper. It is important to aim for creating the highest quality ink possible.

    〈Procedure〉

    ① Drop water on the surface of the inkstone, about the size of a 10 yen coin.

    Step 2: Calm your mind and start grinding the ink slowly. Allow the water droplet and the ink to gradually mix together, and continue patiently until it transforms from a muddy consistency to a sticky state. As you progress with the grinding, there will be a moment when a pleasant fragrance of ink wafts up. Enjoy the various transformations of the ink. The ink you ground on the inkstone will naturally flow away into the “sea,” which indicates the completion of the grinding process.


    〈Grinding Process:〉


    〈Muddy state〉


    〈Sticky state〉

    Step 3: Add a small amount of water and mix. At this stage, add water in small amounts at a time to achieve your preferred level of concentration, as adding too much water at once might dilute the ink excessively.

    Step 4: Pour the ink into the “sea” (inkwell) and mix it thoroughly.

    If you are using a flat inkstone without an “inkwell,” you can transfer the ink to a separate container and mix it there. When diluting ultra-concentrated ink to achieve the desired concentration, it is essential to dilute it gradually and mix it thoroughly. Avoid diluting it all at once.

    The ultra-high concentration ink created in this way has very fine particles, blends well with water, and makes adjusting the concentration much easier. This method can be considered the most desirable. After finishing the grinding process, carefully wipe off any remaining moisture from the inkstone using a cloth or paper. Then, store the ink properly in a paulownia box after proper maintenance.

    How to grind the ink:

    There are two main methods for grinding ink.

    A: Grinding in a circular motion, similar to drawing the character “の” (no).

    This method of grinding in circular motions is said to allow the force to naturally flow out, but it is also known to accumulate ink residue on the inkstone.

    B: Grinding in a linear motion, similar to drawing the character “N” (N).

    Grinding in a linear motion is said to be prone to exerting too much force, but it is less likely to accumulate ink residue on the inkstone.

    Some say that grinding in a linear motion brings out the true color of the ink, while others may argue differently. There is no definitive answer as to which method is correct. What is important is to grind in a way that feels comfortable for you.

    Holding the Ink:

    You may wonder about the best angle to place the ink on the inkstone. There are two main ways of holding the ink: at a perpendicular angle and at an inclined angle to the inkstone. When time is limited, and you want to grind the ink quickly, it becomes essential to increase the contact area between the ink and the inkstone. A larger grinding surface allows for faster grinding.

    A: Holding the ink straight up

    This method involves placing the ink perpendicular to the inkstone and leveling the grinding surface. The size of the grinding surface remains the same throughout, but the initial contact area with the inkstone is larger compared to B.

    〈Leveling the grinding surface〉

    B: Holding the ink at an inclined angle

    This method involves placing the ink on the inkstone at an inclined angle. There are two variations to this method: one involves grinding the ink on both sides alternately to create a V-shaped grinding surface, and the other involves grinding only one side to create an acute angle grinding surface. The initial contact area with the inkstone is small, but as you continue grinding, it gradually expands and becomes an acute angle, resulting in the largest grinding surface.


    〈Creating a V-shaped grinding surface〉


    〈Creating an acute angle grinding surface〉

    We have introduced three different methods of holding the ink, and you are free to choose any of them. While it is unlikely that the method of holding the ink will significantly affect the ink color, what is

    essential is to select a method that feels comfortable for you and to grind skillfully.

    Method for Grinding Ink Quickly

    As a busy modern individual, it is understandable that you would prefer to grind the ink quickly. So, how can you achieve that? The answer is quite simple.

    Increase the contact area between the ink and the inkstone. In terms of grinding ink quickly, method B (holding the ink at an inclined angle and grinding only one side to create an acute angle grinding surface) is recommended. It may take some time to achieve a complete incline, but a larger contact area with the inkstone will result in faster grinding.

    Another method is to stack 2-3 pieces of ink on a large inkstone and grind them together, which also increases the contact area and allows for quicker grinding. However, this approach may not be very practical.

    If you are short on time, using an “ink grinding machine” that grinds the ink for you is also recommended. This can be especially useful when you need a large amount of ink for creating significant works.

  • The selection of materials for sutra copying and a beginner’s set

    The selection of materials for sutra copying and a beginner’s set

    If you have all the tools for copying sutras, you can write every day.

    “When starting sutra copying, you may wonder what you need to prepare. Besides the basic brush and paper, I will introduce additional tools to make sutra copying more convenient and enjoyable.

    • Sutra Copying Paper – Choose the appropriate paper that suits your writing instrument. If using a brush or brush pen, select paper that does not bleed, such as torinoko or kana paper. For beginners, recommended paper includes sutra copying paper with ruled lines and paper with the Heart Sutra as a model.


      mini写経用紙(手本付) 20枚入


      販売価格 (税込):378円


      写経用紙 純美濃雁皮 30枚


      販売価格 (税込):907円


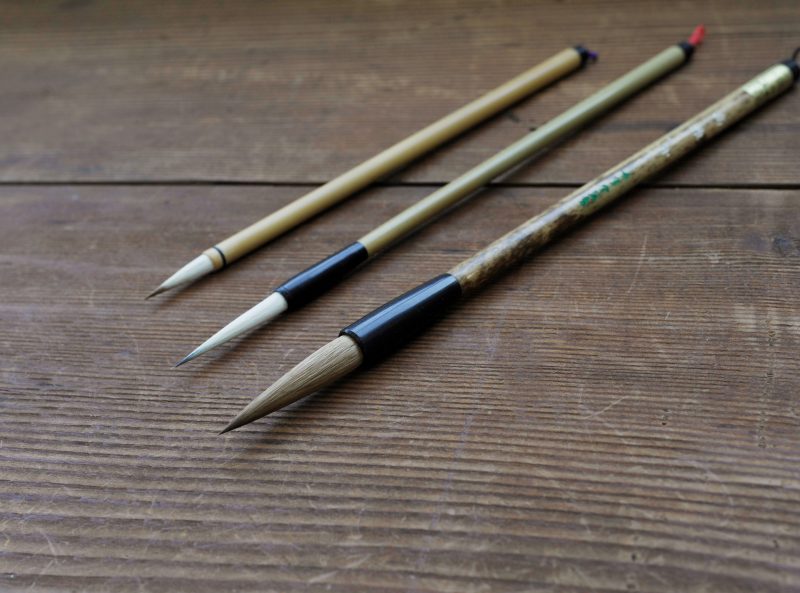
    • Sutra Copying Brushes – Sturdy brushes made of rabbit hair, such as “Touhitsu” or “Jakutouhitsu,” which can hold plenty of ink, are recommended. For those who are not familiar with brushes, brush pens are also okay!


      写巻 朱管筆


      販売価格 (税込):414円


      写経筆 小 秀筆堂


      販売価格 (税込):1,059円


      あかしや新毛筆 SA300


      販売価格 (税込):226円


    • Sutra Copying Ink – For sutra copying, high-quality oil soot ink or sumi ink is recommended. Sumi ink has a pleasant fragrance, and you can expect a relaxing effect while grinding the ink.


      五星 紅花墨 1.5丁型 日本製墨製


      販売価格 (税込):1,544円


      写経用墨 0.7丁型 古梅園製


      販売価格 (税込):1,965円


      写経墨純黒 1.5型 古梅園製


      販売価格 (税込):
      4,536円


    • Sutra Copying Ink Liquid – For those who find it challenging to grind ink every time, sutra copying ink liquid is recommended. Using this liquid makes preparation and arrangement much easier.


      三歌仙(写経・芳名) 50cc


      販売価格 (税込):907円


      開明 写経墨汁


      販売価格 (税込):378円


      銀のきらめき


      販売価格 (税込):604円


    • Sutra Copying Inkstone (Suzuri) – Since only a small amount of ink is needed for sutra copying, a portable inkstone of about 3 to 4 inches is recommended. Some inkstones come in cute shapes that fit in the palm of your hand and are housed in wooden boxes. Look for your favorite one.


      宋抗端渓硯 中国刻 3吋


      販売価格 (税込):3,217円


      老坑 天然硯 3吋


      販売価格 (税込):7,395円


      麻子坑 天然硯 4吋


      販売価格 (税込):5,764円


    • Sutra Copying Ink Container (Sumisashi) – This is a dedicated container for dispensing ink liquid. You can also use small dishes or similar items you have at home as substitutes.”

      Ink Container»
  • How to prepare the brush (fude) with ink:

    How to prepare the brush (fude) with ink:

    Taking care of calligraphy tools is extremely important. With proper care, even a good brush can quickly become unusable. Let me introduce you to the first step in using the brush with care.

    When you purchase a new brush, it may come with the bristles pre-prepared, but most brushes are coated with glue. Brushes with pre-prepared bristles can be used as they are, but for those with glue, you need to remove the glue before the ink can adhere to the bristles. Therefore, if you don’t do this properly, you won’t be able to use the brush effectively.

    1. I will now provide you with easy-to-understand maintenance methods, so you can choose the appropriate way to prepare your brush based on your needs.

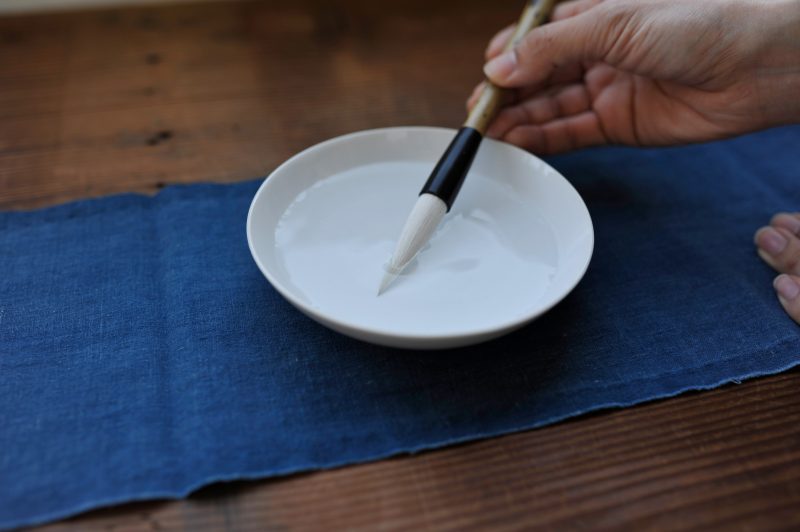
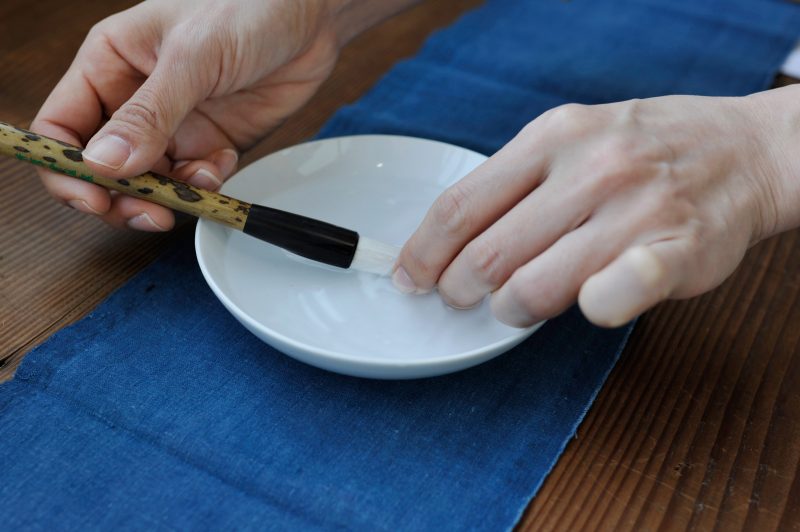
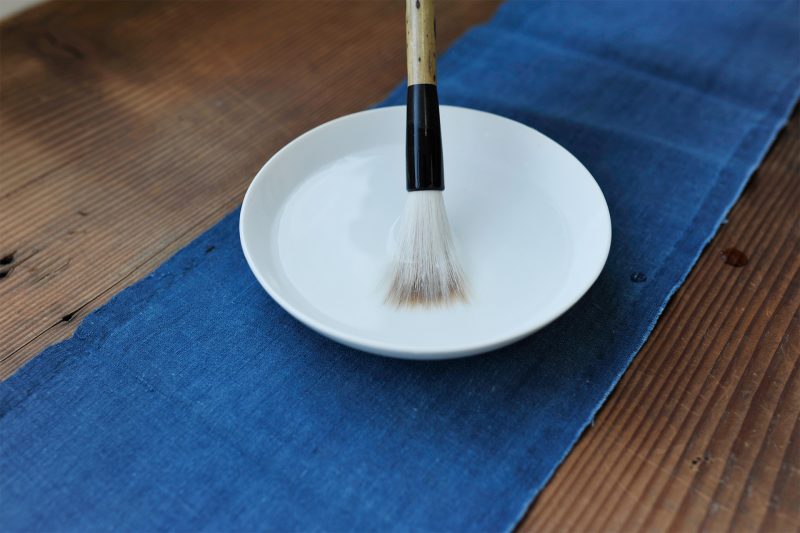
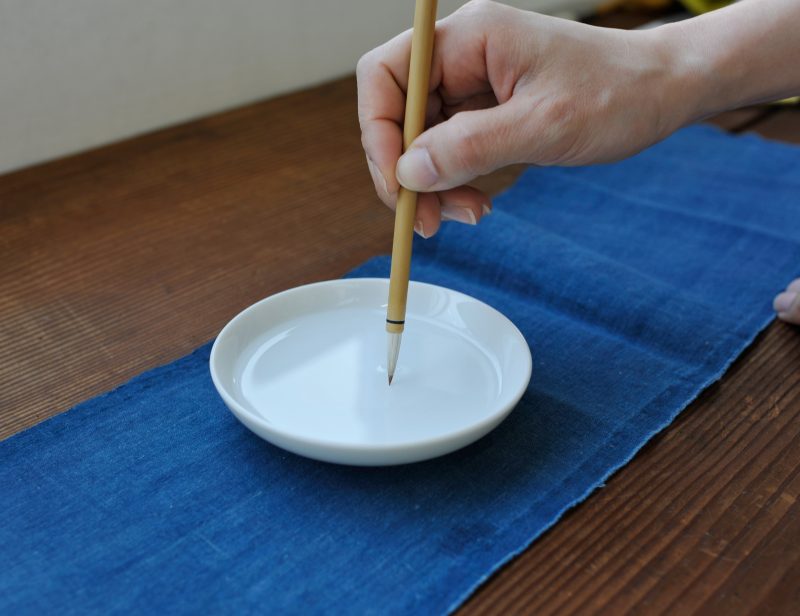
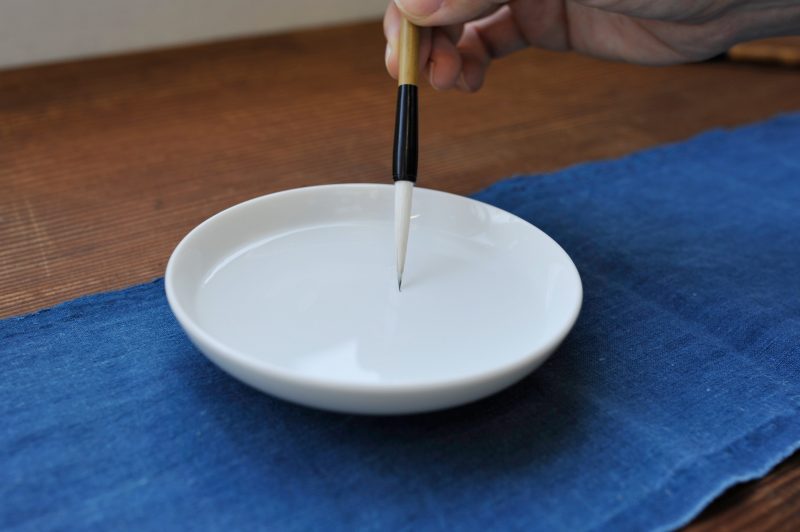
    ① Prepare lukewarm water and moisten the brush tip in it.

    ② Gently untangle the bristles from the tip to the base using your fingers.

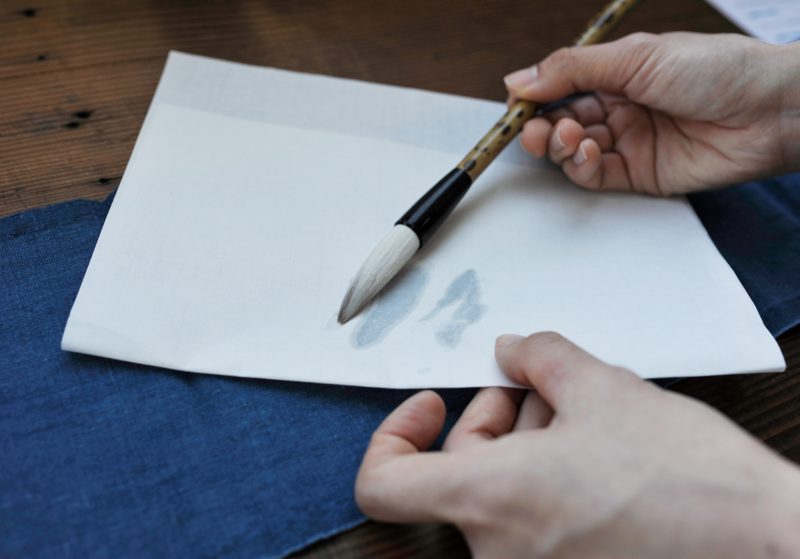
    ③ The lukewarm water may become murky. Make sure to remove the glue inside the brush (if applicable) thoroughly, and use paper or cloth to wipe away the moisture. (Please remove any loose or fine hairs that may come off during this process.)

    Method of using only the tip of the brush:

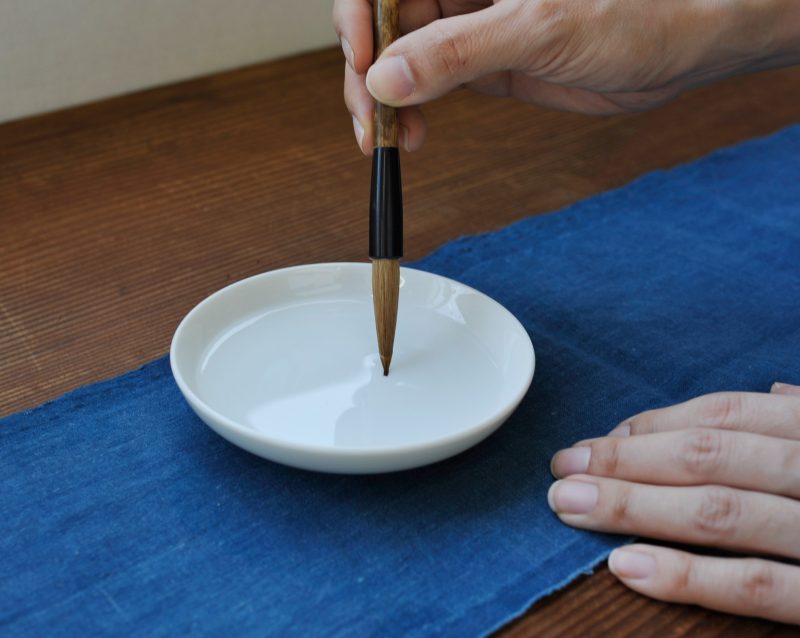
    For fine writing such as Shakyō, Kana characters, and name writing, you use only the tip of the brush. Instead of fully submerging the brush, you dip only the tip in ink. The length of the exposed tip affects the thickness and style of the characters. Adjusting the length of the tip allows you to bring out the unique characteristics of the brush strokes.

    Even with stiffer brushes, such as those with coarse hair, you may choose to use only the tip to better utilize its potential. Adjust the length to suit your purpose and the type of characters you wish to write.

    How to Prepare the Brush:

    Depending on the type of brush—fine brush, Kana brush, or large brush—please refer to the respective methods below:

    【For a Fine Brush】

    Prepare lukewarm water and moisten about one-third of the brush tip. Envision the type of characters you want to write, and then adjust the length of the exposed brush tip accordingly.

    【For a Kana Brush】 

    Prepare lukewarm water and moisten about one-third of the brush tip. Envision the Kana characters you want to write, and then adjust the length of the exposed brush tip accordingly.

    【For a Large Brush】 

    Prepare lukewarm water and moisten about one-third of the brush tip. If necessary, gently untangle the brush tip without dipping it in water. Then, expose about one-fourth of the brush tip. Be cautious with brushes that have different-colored decorative bristles, as overexposing the brush may cause the decorative bristles to become untidy.

    For a “Sabaki Fude” (捌き筆) or scatter brush, it is a brush without glue, also known as a loose-haired brush. In this case, you can use it as it is without any preparation. However, if you find it necessary, you can lightly rinse it with water before use.

    After finishing, it is best to wash the brush under running water, then use a brush comb to tidy up any unnecessary hairs. Once the brush is thoroughly dry, it is ready for use. It is recommended to let the brush dry after preparing it before using it. To improve air circulation, you can remove the cap, as it is usually sealed.

    While the method of preparing the brush may seem basic, it is a fundamental aspect that applies to all aspects of calligraphy. Treating each brush with care and using it diligently is essential to continue using them for a long time.

  • The daily stress eases away. Through copying scriptures, the mind becomes light and cheerful.

    The daily stress eases away. Through copying scriptures, the mind becomes light and cheerful.

    In recent years, copying scriptures (Shakyō) has been gaining popularity, especially among women.

    Copying scriptures has been loved by people since ancient times, and it has been widely studied as a valuable material for learning the art of calligraphy due to its ease of practice. More and more people are experiencing the benefits of Shakyō, saying that it helps them feel refreshed and uplifted. This trend has become particularly popular among women.

    Originally, Shakyō has been practiced as part of Buddhist practitioners’ training.

    The goal of Shakyō is to cultivate a pure and serene mind, and it has been practiced as a form of training within Buddhism by transcribing Buddhist scriptures. By copying the teachings onto Shakyō paper, one can dispel impure thoughts and regain the inherent stability of the mind, leading to an opportunity to recognize the purity within oneself.

    The highly positive effects of Shakyō include:

    Shakyō, which can be started easily, is believed to have numerous benefits across various areas. Practitioners experience positive changes such as mental relief, potential dementia prevention, improved handwriting, and better posture.

    Shakyō, with a focus on mental detoxification and brain activation, has been gaining attention.

    Effect of Shakyō 1: Effective for Dementia Prevention and Improvement

    Shakyō is believed to be effective for preventing and improving dementia. By enhancing concentration and exercising memory, it is thought to activate the brain and promote healthy cognitive functions. Additionally, it contributes to mental relaxation and stress reduction, potentially reducing the risk of dementia.

    Effect of Shakyō 2: Achieving a Stress-Free Daily Life

    Shakyō is effective in achieving a stress-free daily life by promoting mental stability and relaxation. The act of meticulously transcribing characters helps calm the mind and alleviate daily stress and anxiety. It brings about a sense of well-being and contributes to maintaining a peaceful state of mind.

    Effect of Shakyō 3: Boosting Favorability with Beautiful Handwriting and Posture!

    Shakyō has the effect of increasing favorability from others through the improvement of beautiful handwriting and posture. The practice of meticulously writing characters not only enhances the beauty and style of one’s writing but also helps improve posture. This, in turn, reflects a confident and attractive demeanor, leading to positive evaluations from others.


    Calligraphy Supplies for Shakyō.
    https://shoyu-net.jp/?mode=grp&gid=1458349

  • The History for Sumi of Japan

    The History for Sumi of Japan

    “The introduction of ink (Sumi) to Japan and the history of Japanese ink.”

    The introduction of ink to Japan is believed to have occurred around the same time as the introduction of writing. As indicated by the golden seal of the “Kingdom of Wo” (Kan’Wa Na), it is thought that the people of Han (China) became aware of writing and ink at that time. According to the “Weishu Weiren Zhuan” (Records of Wei: Account of the Wa People) from the year 239, Queen Himiko sent an envoy with a letter to Luoyang in Wei, and it is also mentioned in the “Jinshu” (Book of Jin) and “Songshu” (Book of Song) that the five kings of Wa (San, Chin, Sai, Kō, and Bu) also sent letters. It can be inferred from this that by this time, the existence of brushes and ink was well-established. However, these are only speculations, and detailed information is not known.

    In the “Nihon Shoki” (Chronicles of Japan), it is written that in the 18th year of Empress Suiko (610 AD), in the spring of March, the king of Goguryeo presented a Buddhist scripture to Japan, and a Buddhist monk named Domyeong (from the Asuka period) who accompanied him was knowledgeable in the five classics and skilled in making colored pigments, paper, and ink. This is considered to be the oldest record related to ink in Japan. It is known that when Prince Shotoku wrote the “Hokke Gengi” (Commentary on the Lotus Sutra), he used the pine soot ink brought by Domyeong, and fragments of a circular inkstone found at the ruins of Asuka’s capital indicate that ink was already being ground on inkstones at that time.

    With the implementation of the Ritsuryō system following the death of Prince Shotoku, the Daihō Ritsuryō was enacted in 701, and the Nakatsukasa no Sho (Ministry of Central Affairs) was responsible for ink production. Ink was considered a valuable item and the demand for ink used for copying Buddhist scriptures increased with the flourishing of Buddhism.

    During the Heian period, there was an increase in the mass production of ink, particularly the pine soot ink (Matsu-en sumi), and it began to permeate among the general population. Japan was the pioneer in the development of oil soot ink ahead of other countries, responding to the increasing demand for ink.

    During the late Heian period, there was an active trade between Japan and Song Dynasty China, leading to the introduction of ink painting and the flourishing of calligraphy by Zen monks. This further increased the demand for ink, and many skilled calligraphers emerged in Japan.

    Thus, during the Heian period, while the mass production of pine soot ink (Matsu-en sumi) was widespread, research and development of oil soot ink were also conducted, marking a transitional period for ink.